Hi All,
Before I launch into the annual report I have some very exciting news that I would like to share with you all. DERMPAV has created a Patreon Channel.
The DERMPAV Patreon Channel will allow you the opportunity to receive regular and much more detailed reports on the restoration progress of AEC 560. These video reports are posted to our Patreon channel soon after they are made. So you do not have to wait until the end of the year for a report on the progress being made on 560, you will have it nearly instantly.
Joining the DERMPAV Patreon channel will require a small financial contribution of $15.00 per month, this becomes $180.00 over the year. So here is the chance to shout yourself an early Christmas present. We have been loading content onto our Patreon Channel since October 2018. In our “On the Buses” segments which deals with the restoration of AEC 560 we are up to No.10.
After becoming a DERMPAV patron by making the financial pledge through our Patreon channel. You will have all the video content unlocked, as well as having the ability to contact us through our Patreon channel for our “Closing the loop” segment where we read out feedback from our patrons. You will also receive an exclusive invitation to our Depot Day, and this will only be extended to our patrons. This invitation will give you the opportunity to meet, greet and speak to those people that create the restorations that you watch from your home computer or device. It will also allow you the opportunity to inspect close up the restoration that holds your interest to be able to touch and feel it, to appreciate the investment of work.
Please consider joining us on Patreon as your financial contribution will be used to sustain our organisation into the future ensuring we can continue our restorations at a faster pace than we could previously. We do apologise for some of the video quality as we are on an enormous learning curve with lighting and camera angles to bring the best and most interesting content to you
Just below is a link to our Patreon Channel please check this out for a better description or to watch the introduction Video. Please view it, then scroll down to see the video content that we have already posted. If you then consider this worthwhile please push the orange button to become a Patron. Many thanks for your kind considerations. Join us on Patreon!
DERMPAV Patreon Channel –
https://www.patreon.com/user?u=14209441
I think we should now move onto the annual report, where to start there has been so much progress!
As the festive season approaches once more, it has been my practice at this time of the year to reflect back on the year past and give you all an overview of the works undertaken on AEC 560. So I am back again to report on more progress in the restoration of AEC 560.
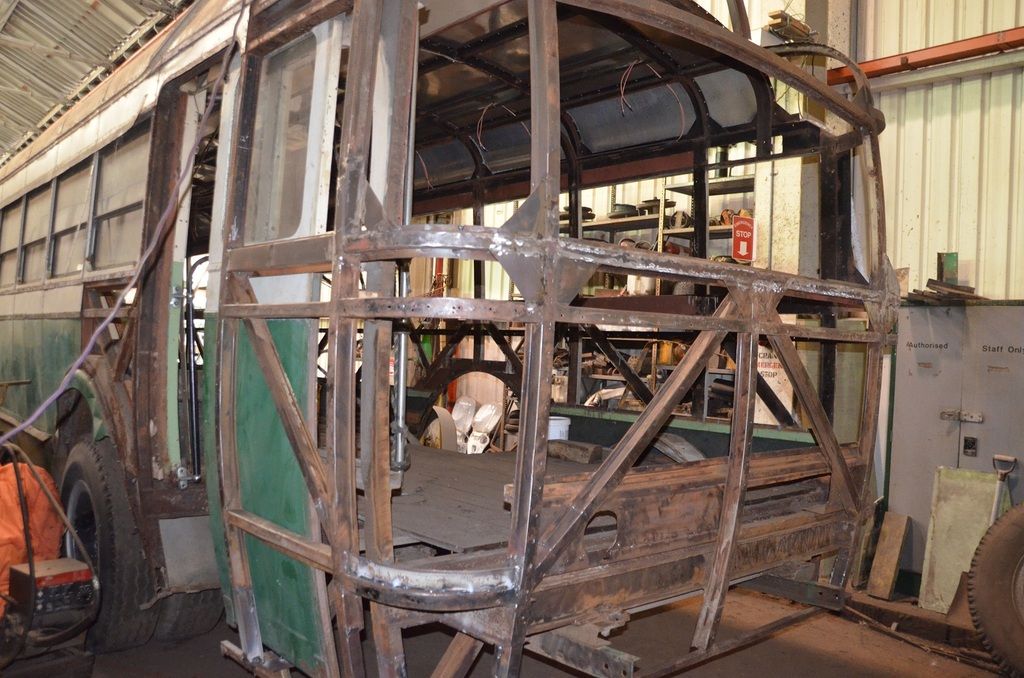
2017 had been a frustrating year for us as a number of distractions had taken our focus away from the bus. Problems were also experienced with the various curves in the framework that had to be accommodated in the rear frame repairs, to ensure the interior and exterior panels would rehang correctly. Although it looked straight forward the framework on the rear of the bus was very tricky to get it set correctly. At the end of 2017 we still needed to complete a couple of repairs, these were accomplished by late January 2018, then the rear frame repairs were completed and ready for inspection and sign off.
Whilst arranging the inspection to the rear frame work of the bus we were notified by our accredited Vic Roads Engineer that their company had moved in a different direction and could no longer continue with our project. They suggested another company and representatives for that company inspected the rear frame repairs of AEC 560, this inspection occurred on the 5th March 2018. The rear frame repairs were passed, but at the same time they completed a chassis inspection, this subsequently failed, where it had passed previously.
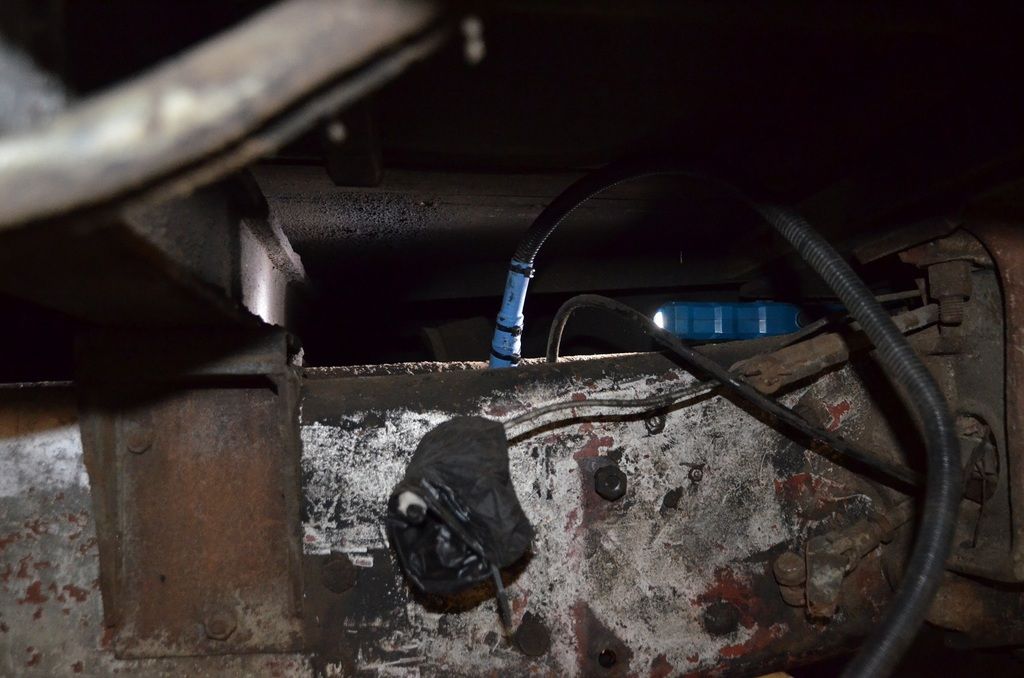
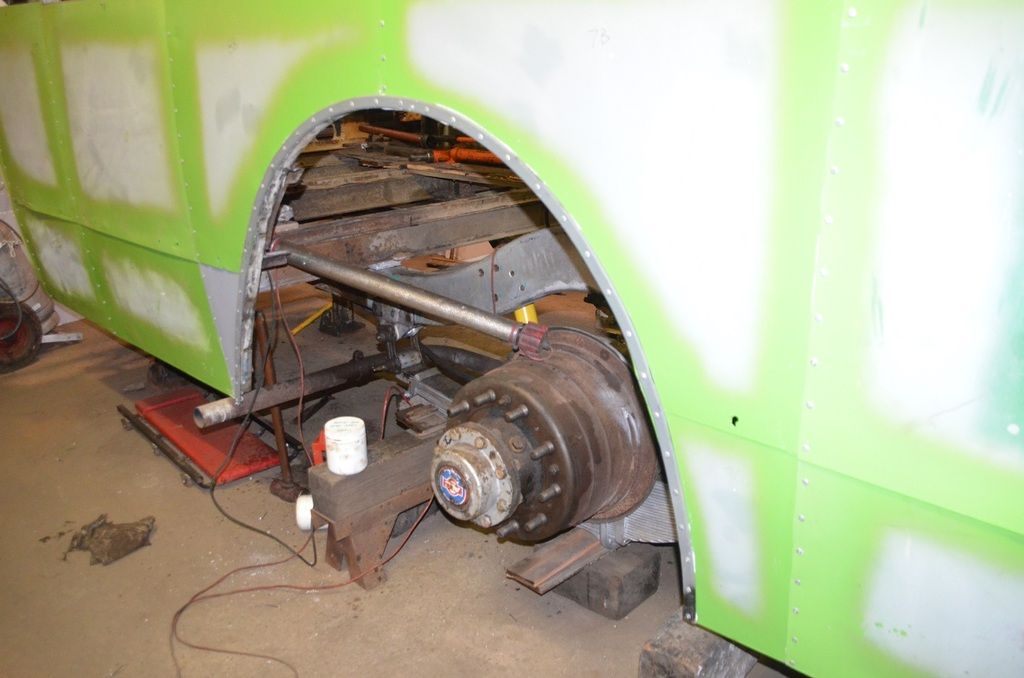
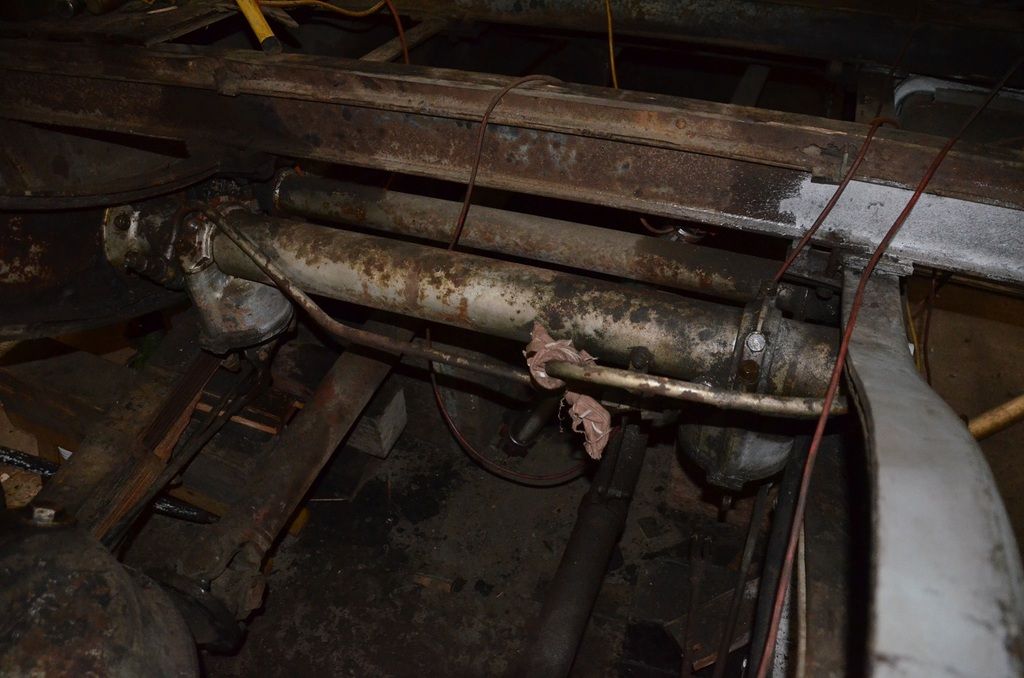
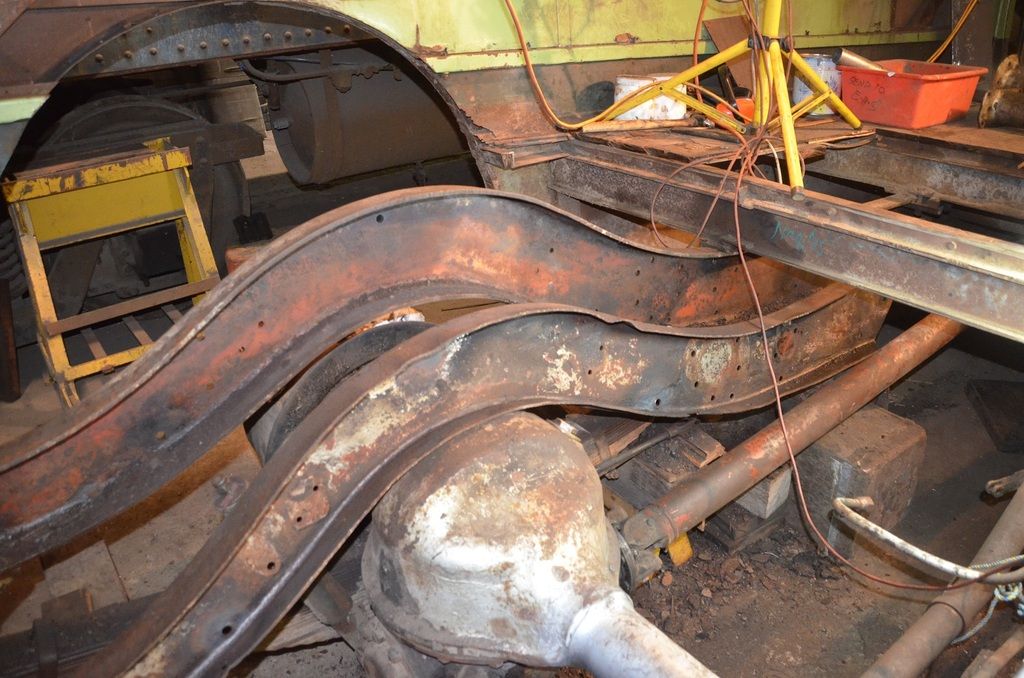
Our new engineer was concerned with the hump in the chassis where it rises up and over the rear axle. The Associated Equipment Company had installed a strengthening piece that sits inside the chassis rail and follows it over the hump of the rear axle. It did not look like it was sealed and concerns arose from the road grime and decay that looked like it is present within the gaps of the chassis strengthening piece and the chassis rail itself. Our engineer requested that the chassis strengthening section be removed and the surfaces between the two be reinspected once separated and cleaned. This resulted is us having to disconnect the rear suspension unit from the chassis, loosen the body to chassis securing bolts and clamps, then remove all the permanent fastenings holding the chassis strengthening member to the chassis rail and remove the chassis rail stretchers. Then the chassis strengthening members could be removed.
When we were told this had to happen we understood this was going to be a huge undertaking. Our accredited VicRoads engineer pulled no punches, indicating to us that if the chassis rail was decayed beyond acceptable limits the entire chassis rail would need to be replaced. We knew that was beyond our capacity to complete, so we then understood that if the chassis rail failed then we would probably scrap AEC 560. To say we were concerned was an understatement.
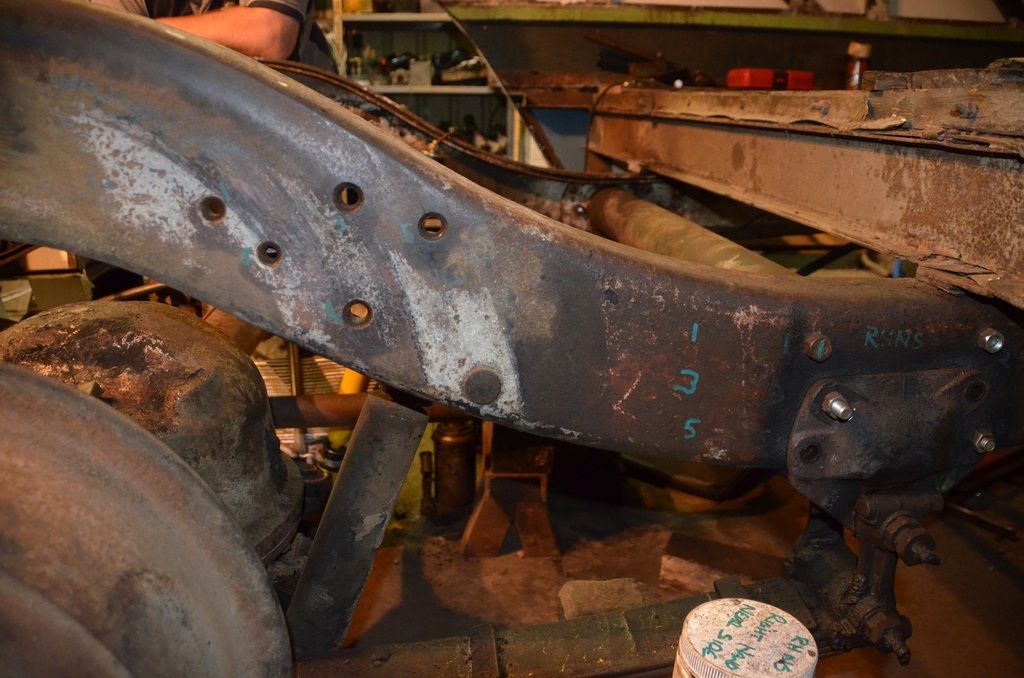
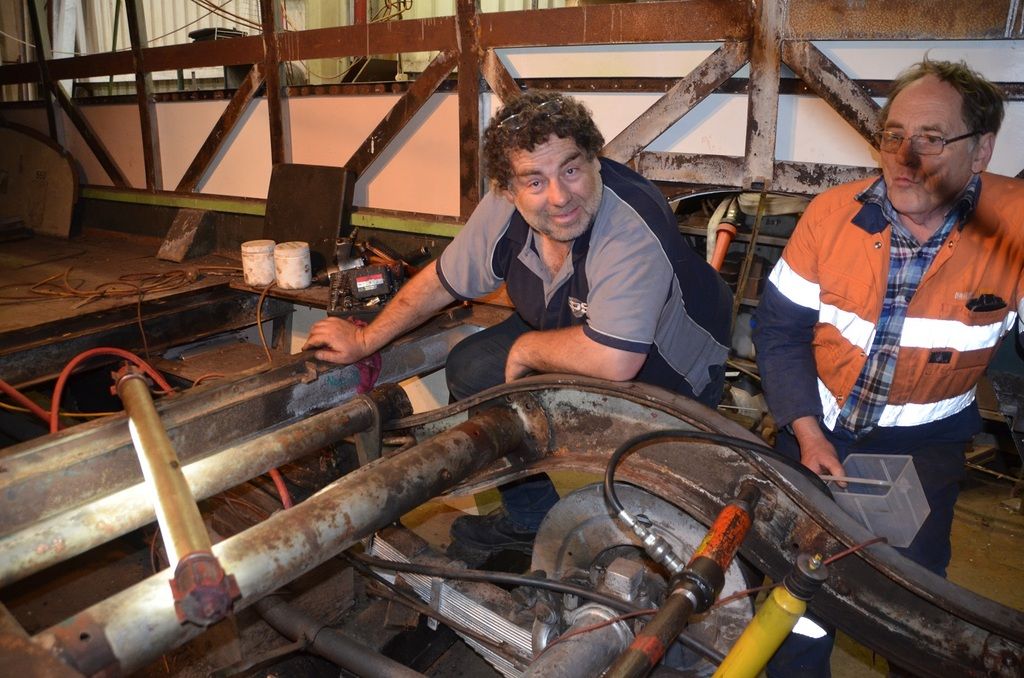
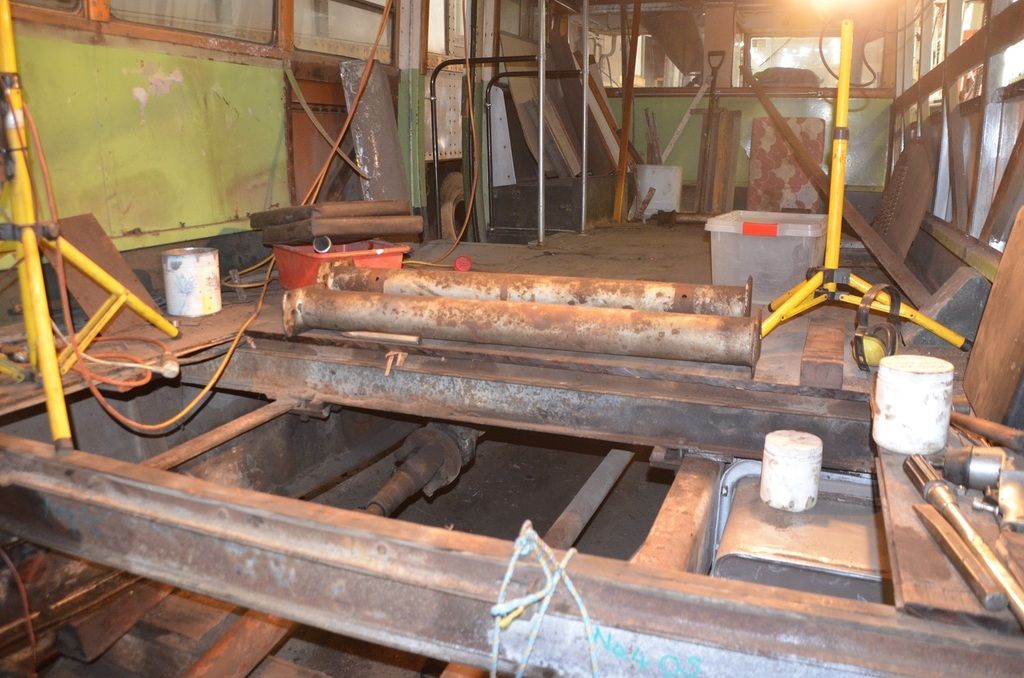
To give us freer access to complete this task we removed three floor sections in their entirety, these are, those directly behind, directly over and directly forward of the rear suspension unit, this allows access to the main work area to remove the chassis strengthening sections. Adaptors that fit the top of the jacks and fit the chassis rail have been constructed to prevent the chassis slipping when in use. The rear suspension unit has been securely packed to ensure it will not slip once it is released from the chassis rails. With a paint pen we marked the head of each of the bolts and marked the same number on the chassis section, this will enable each bolt to be replaced back into its original position, when we reassemble the chassis strengthening sections after the repairs have been completed. The removal of these bolts proved so difficult that it has required the manufacture of special kit, this allows our porta power the ability to force the bolt out of the chassis location. The problem with the bolts is they are fitted bolts placed into reamed holes in the chassis. These bolts were installed without the application of an anti-seize grease, hence over time they have rusted in place requiring superhuman strength to free them up. Carrying out our visual self-risk assessment we felt that we were going to do ourselves an extreme muscle injury if we proceeded, so we came up with the porta power option and stopped until the attachments were completed. At the working day of DERMPAV on the 18.9.2018 John Dixon worked tirelessly to remove all the nuts off the various bolts so these were ready to push out, and coated them with liberal amounts of CRC penetrant oil.
This restoration game is a hard and difficult task and one which constantly requires constant vigilance to identify hazards that are ready to spring out and ambush us. We very often stop work to give us time to sit and talk about the processes we are going to employ before moving forward. On the 13.11.2018 we successfully removed the off and near side chassis strengthening members. It was encouraging to see that the most of the decay caused, seemed to be confined to the chassis strengthening members on both sides. The rust that we struggled with between the laminations was off the chassis strengthening members, once these were removed an examination of the main chassis rail could be completed and both looked to be in surprisingly good condition. There was evidence of decay on the chassis but on the whole it looked like it was in good condition. The chassis strengthening members on the other hand are going to require extensive repair. We proceeded with the aid of a needle gun to remove all decay off the chassis rail bringing the pieces back to bare metal ready for inspection.
On the 27.11.2018 our Vic Roads Engineer came on site to inspect the chassis rail and the chassis strengthening members, this is better covered in On the Buses – 2018 – No.9. We discussed the condition of the chassis strengthening members and then how these could be repaired and obtained a scope of works for their repair. The chassis rail was then inspected and both of these passed inspection. That was a huge relief, I will tell you! At that point we knew the AEC 560 will return! We discuss the repair methods and the processes we will employ in some detail in On the Buses – 2018 – No.10. to make the chassis strengthening members serviceable again and preserve the chassis rail for future use.
When we reassemble the chassis strengthening members back into the chassis rail we are intending to apply a very liberal coat of Loctite 767 anti-seize grease we will then use a sika product to seal the joint gaps where the two joints meet. We feel this will allow us to remove these chassis strengthening members if the need arises again. The loctite anti seize grease will also provide a good barrier to resist the ingress of water or contaminates in the future. We are currently working on the repairs to the chassis strengthening members based on the scope of works provided, to again make them serviceable, as this is occurring they will be fitted back to the chassis rail to ensure they are fitted correctly.
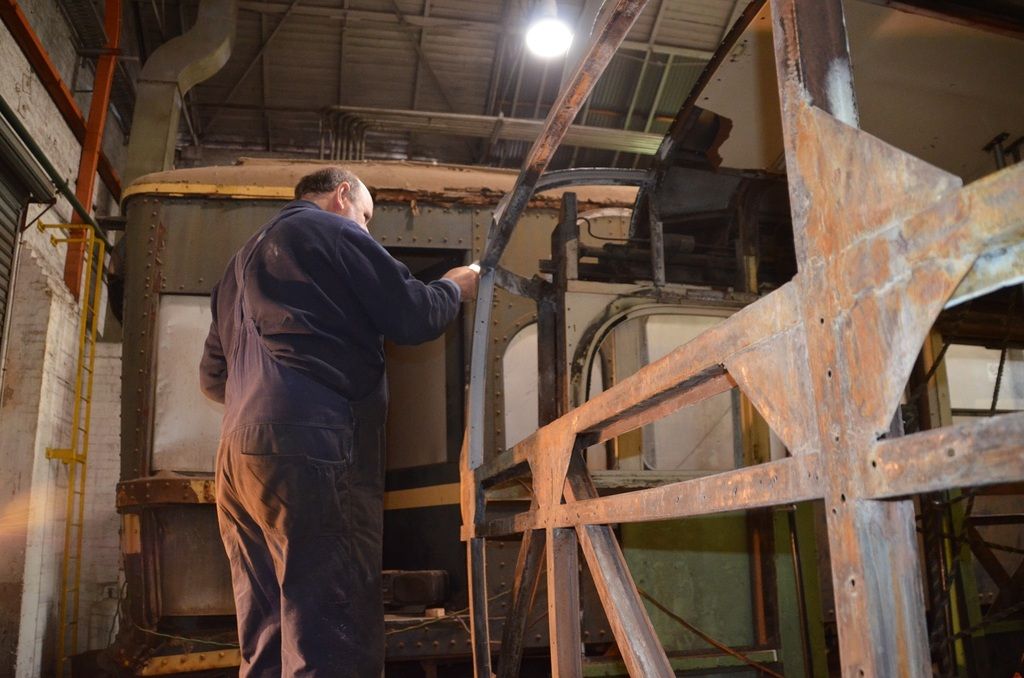
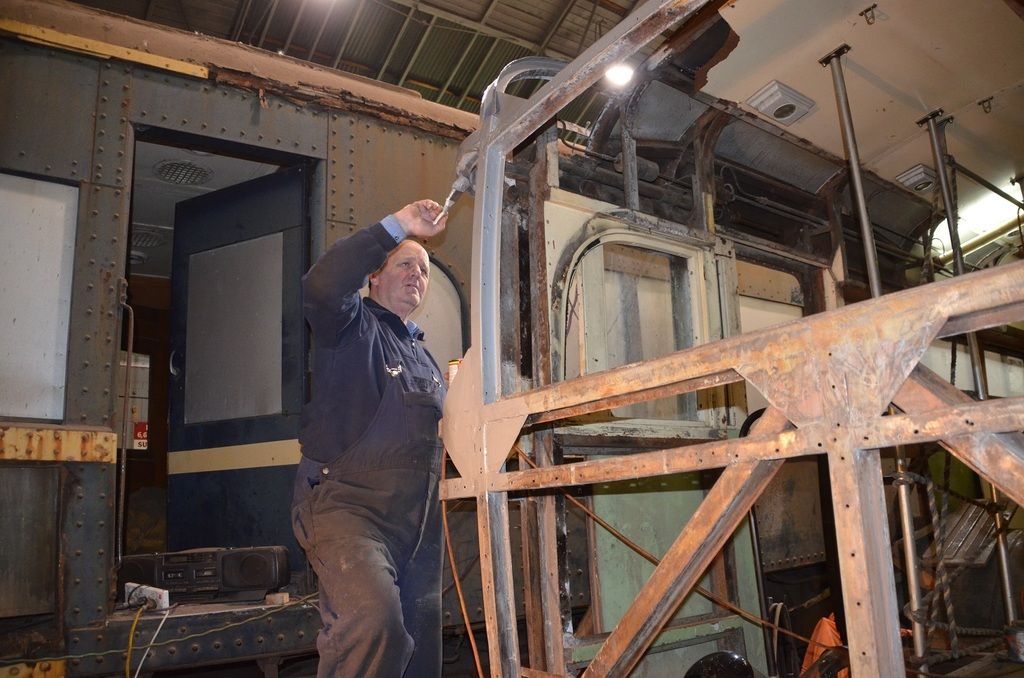
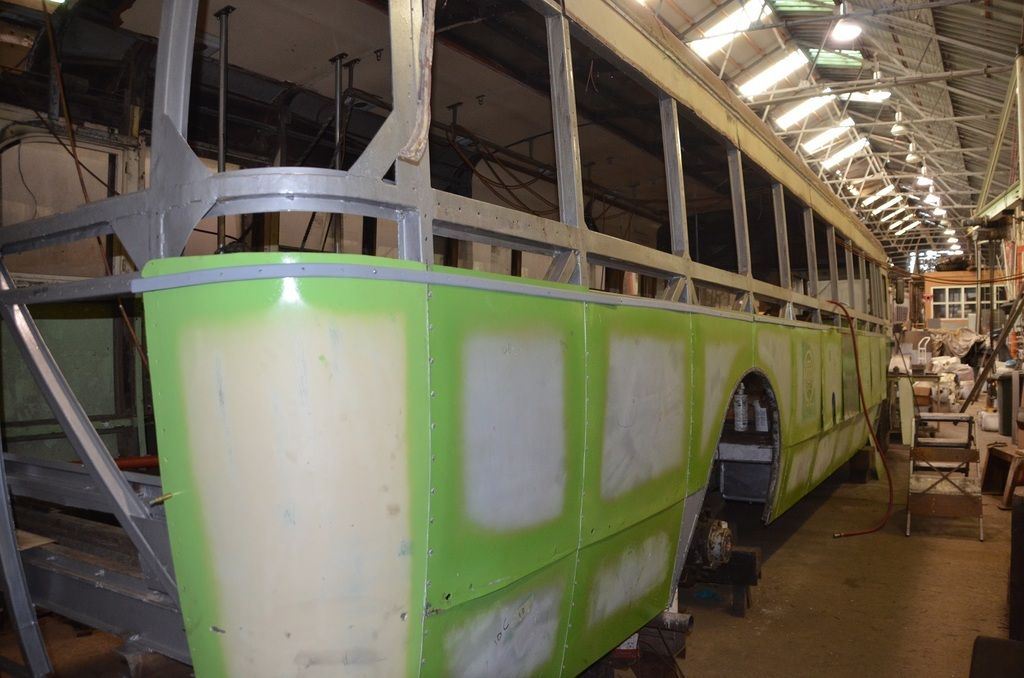
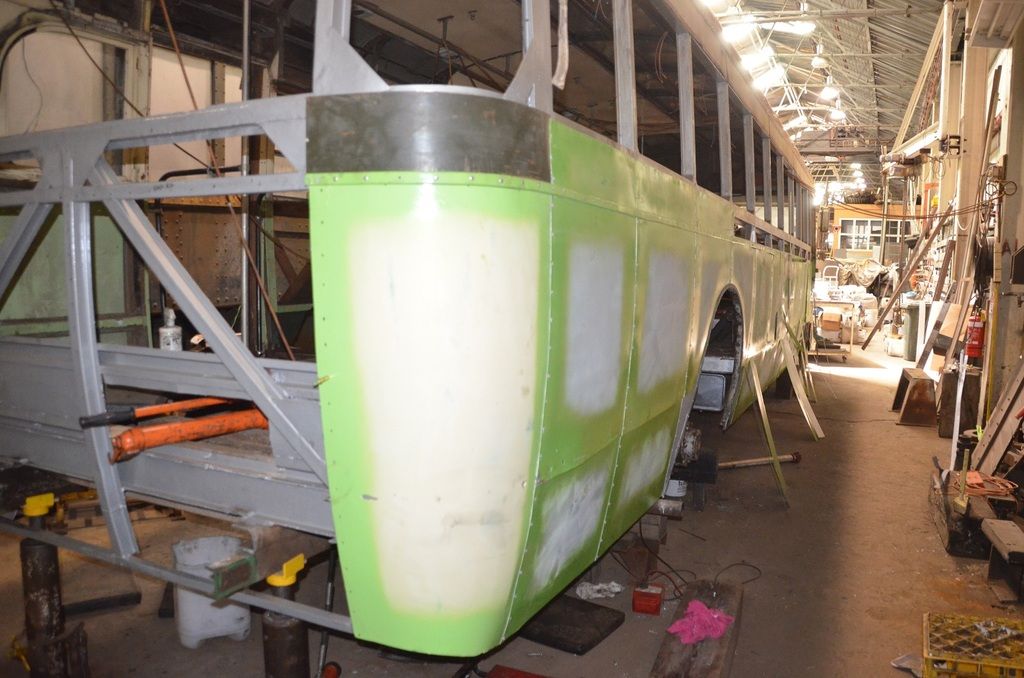
With the rear frame repairs passed, the bus restoration team then moved up a gear and painted the rear frame work of the bus, once this was completed they commenced refitting all the exterior panels on the off side, these had previously been repaired by our panel master. These were numbered to show their correct location on the exterior of the bus. They were first installed using our clecos or our small bolts and nuts to ensure the panels lined up with each other correctly and with the framework. Once this was established the fastener and each panel was removed and the edges of all the off-side panels were painted green to ensure there was enamel paint in the locations where two panels overlapped once the paint dried they were replaced back onto the bus. After this, the panels were fitted, being located with as many pop rivets as we could possibly fit into the panel to ensure it was correctly aligned. We were mindful that panels need to overlap each other and where this occurred we did not place rivets until the second panel was in place. Once we were happy with the location all the pop rivets were installed. We were also sealing with paintable silicon the position where the two panels overlapped, this will seal the joint and give us the best protection against rain water running in between the panels.
We had an extreme amount of trouble locating a solid aluminium rivet of the dimensions that we had taken out of the bus, these secure the roof panels and the gutter of the bus to the framework and the exterior panels. The head of the metric rivet was too small and there was not an imperial rivet available within Australia that met the dimensions required. I had a conversation with a chap from major solid rivet company in Sydney about sourcing these and he asked if I was restoring a Land Rover! No! I explained what we were doing, he suggested that we contact a firm in England that still makes all of these rivets and will supply in the quantities that we needed, he supplied the contact details. Looking on their website we found the rivet we needed it met all the head specifications perfectly and its shank was 7/32 which also seemed correct. It is a bit difficult to estimate the shank size from the original rivet as the rivet deforms during the installation process to occupy the available space in the hole. After we established the length of the rivet and the number required we wrote to the company asking for a price on these rivets. We also needed to acquire the air rivet gun and the respective rivet dolly for installation of these rivets. Again, none of this equipment was available in Australia so we thought that we would have to purchase more equipment, but in the end one of our members produced an air chisel and suggested that we manufacture a rivet tool to suit this gun. Another member who was is a retired fitter and turner made the mandrel on our lathe this fitted the chisel gun and effectively converted it into a rivet gun, he also made the rivet dolly. So, we did not have to purchase anything……Happy Days!
We have now replaced all the off side lower exterior panels of the bus and replaced the side dress strips and the advertising strips, we still need to paint and install the repaired window sills. Once completed we will then be able to identify the dress strips and then install these in position. The panel master advises that he will probably give the entire off side of the bus a coat of its correct colour green, as he feels this will lift the spirits of the people working on the bus. In any case it will need to have more coats of green added before we reach the final top coat.
The installation of the interior panels will have to wait until the chassis repairs are completed. On the exterior we will move across the back of the bus and down the near side. But first, we are going to work on completing and installing the off-side window sills, if you look back in previous posts you will see these have been out and the decay removed and sandblasted and undercoated. These will now receive our rust preventative paint then a hi fill primer with a tie coat and once applied they will then be painted in the bus green and once the paint is dry they can be installed into the bus. We also have one panel situated above the window sills that has decay, this will need repair it is held in place by the solid aluminium rivets, our panel master is working through the thought process on the best way to repair this panel.
Once we have completed the chassis repairs and the exterior panel repairs are completed to the off side, we will remove the exterior panels from the near side and start the frame restoration on that side, having seen the rear of the near side frame work it looks just like the off side with the addition of the door motors and the side steps. We still feel sure that 560 will still hold some challenges for us.
There is still quite a lot to do, the passing of the chassis inspection by our accredited Vic Roads engineer, has provided us with the necessary inspiration to forge on ahead. We only need to get down the near side around the front and we have finished. Easier said than done.
Paint
We needed to obtain the correct shade of paint to paint the exterior of the bus. We had no clue what that looked like, from a photo that had been sent to me I went to the paint shop and had it paint matched. I definitely do not recommend this process. I gave the paint to the panel master then about two days later received a phone call, the colour is wrong! Ok, so we journeyed over to the Bylands tram museum with our paint samples, after polishing a section of panel we matched the paint colour on AEC 537. We understood that a lot of research had been undertaken when this colour was applied to this bus. As that is the same era that we want to display AEC 560 in, we obtained a colour match off that bus. I then took it to our paint people and had it matched to the colour sample obtained off AEC 537. This was then used to spray the panels, no more phone calls!!. Our thanks is extended to the Bylands Tram museum for allowing us access and the ability to obtain an accurate paint match, your efforts are most appreciated.
At the start of 2018, the restoration team members decided that I should stand in front of my camera and make a video of the restoration progress of the bus and post it as a side juncture to this post. This is without a doubt a lot of work, and I am not sure I have done it justice! I think now that we have launched our Patreon channel where updates can be viewed as the restoration is created. I will revert back to this report as our annual report and using my still photos to illustrate the text. As I have previously stated, it is a huge amount of work, editing, rendering and posting videos for viewing. So, my apology there.
Here is a link to the Bus Australia Forum Video on AEC 560, please click on the link to run the video, hope you like it!
https://youtu.be/JJaIyxlylNE
Once again, if you are interested in keeping up with the restoration progress on AEC 560. I would ask that you consider joining us on Patreon as stated above, your financial contribution will be used to sustain our organisation into the future and ensure the financial stability to ensure we can continue our restorations at a faster pace than we could previously.
If you would like to become involved with DERMPAV as an active member and be involved with the restoration of AEC 560 then please let us know you are interested, we can be contacted at
info@dermpav.net.au we will then drop you a line letting you know our working days of DERMPAV so you can come along.
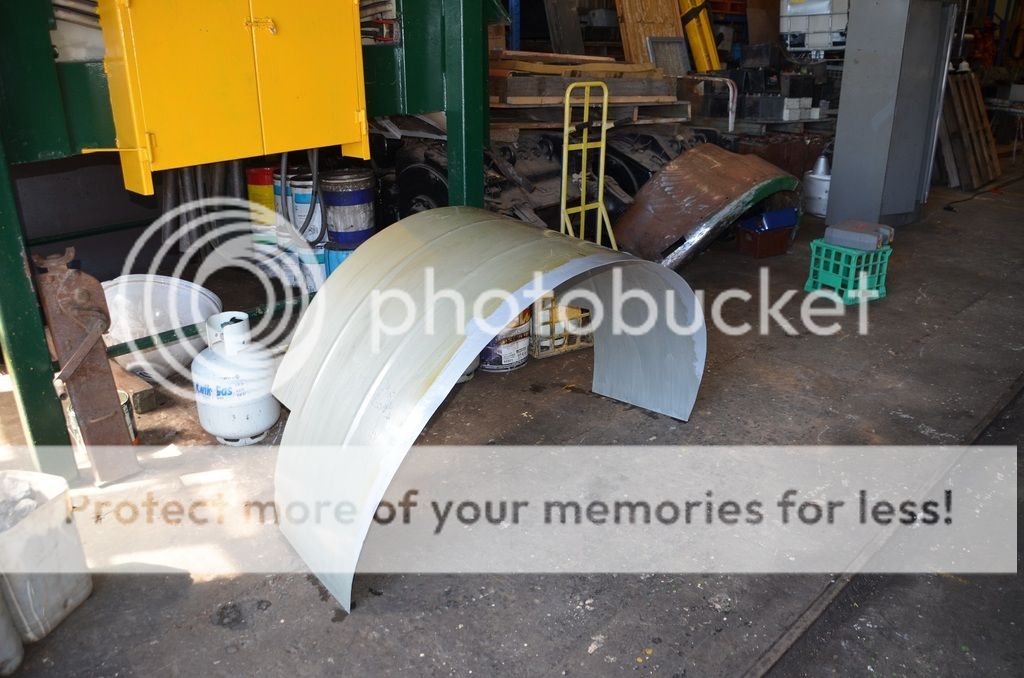 Above:
 The off side guard has had extra metal added and this has been prepared and painted, it is now ready for assembly.
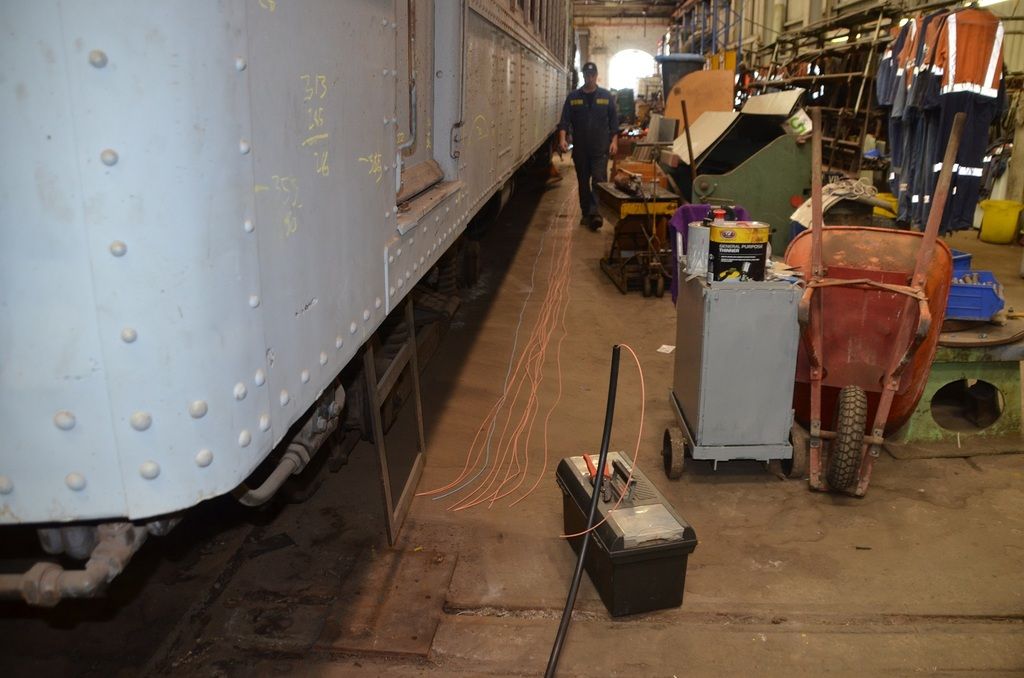 Above:
 Shows the electrical wires laid out next to 64 RM as the indicator, stop light tail light loom is made up, the wires are being readied to be combed as they are pulled into their protective sheath.
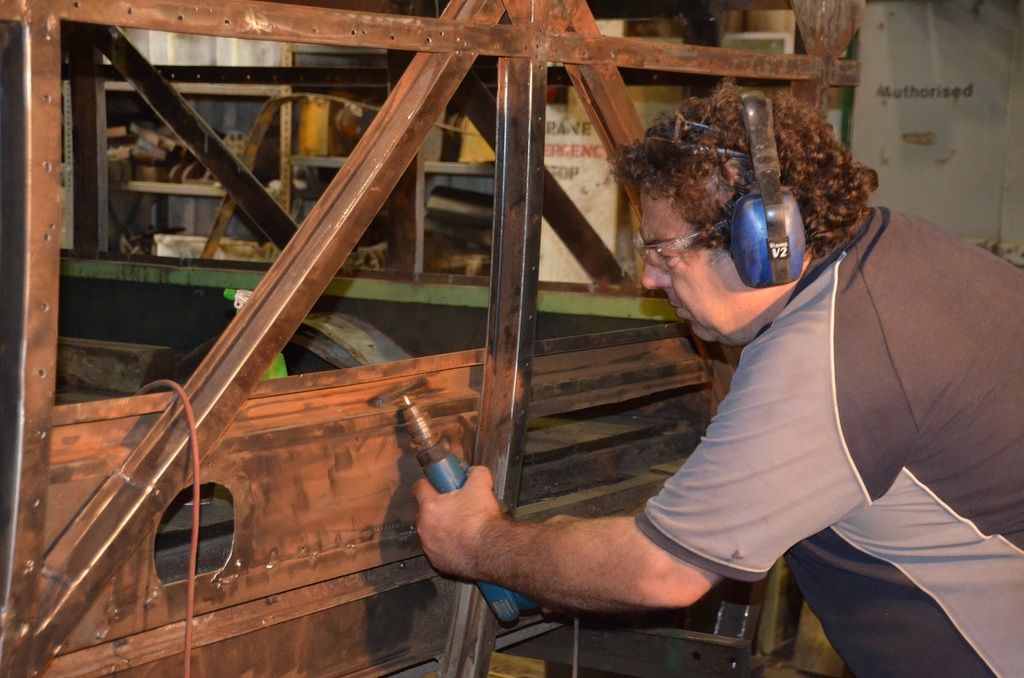 Above:
 Shows John using the wire wheel to clean off the surface rust for the rear frame inspection.
 Above:
 Shows Max and myself running the new wiring loom, this unfortunately was completed before we found out about the chassis strengthening member having to be removed.
 Above:
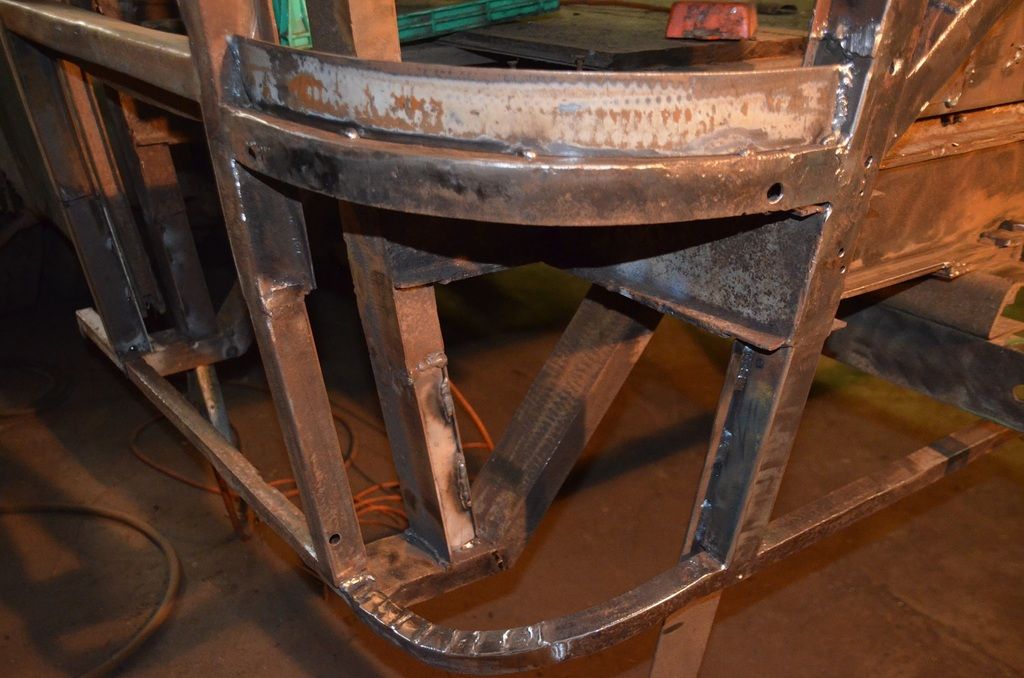
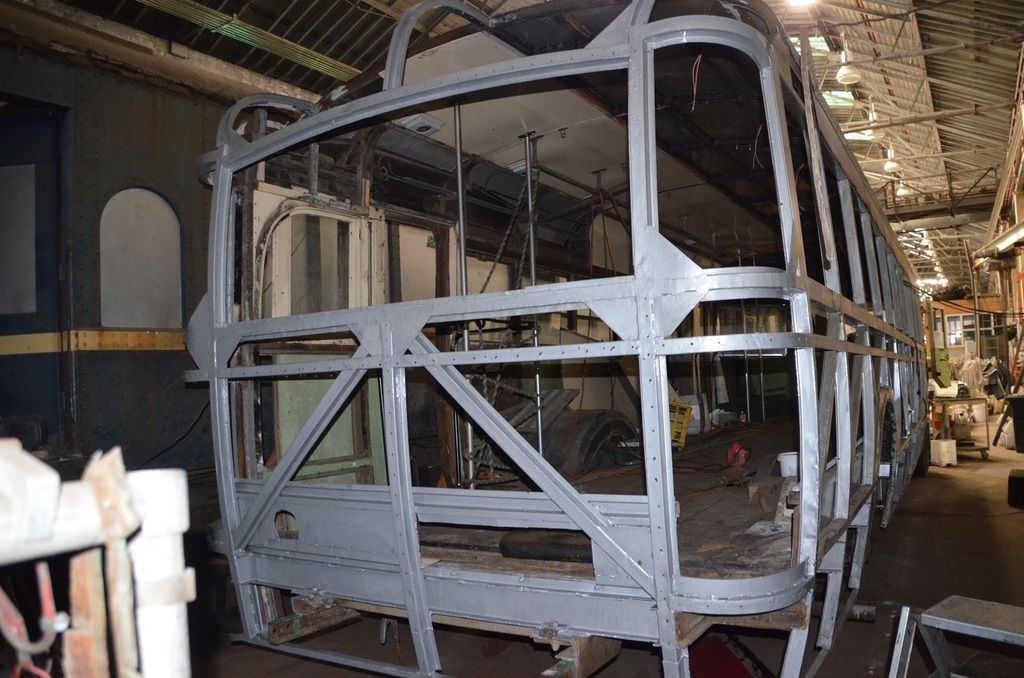
 Here the rear frame work has been cleaned and is ready for inspection.
 Above:
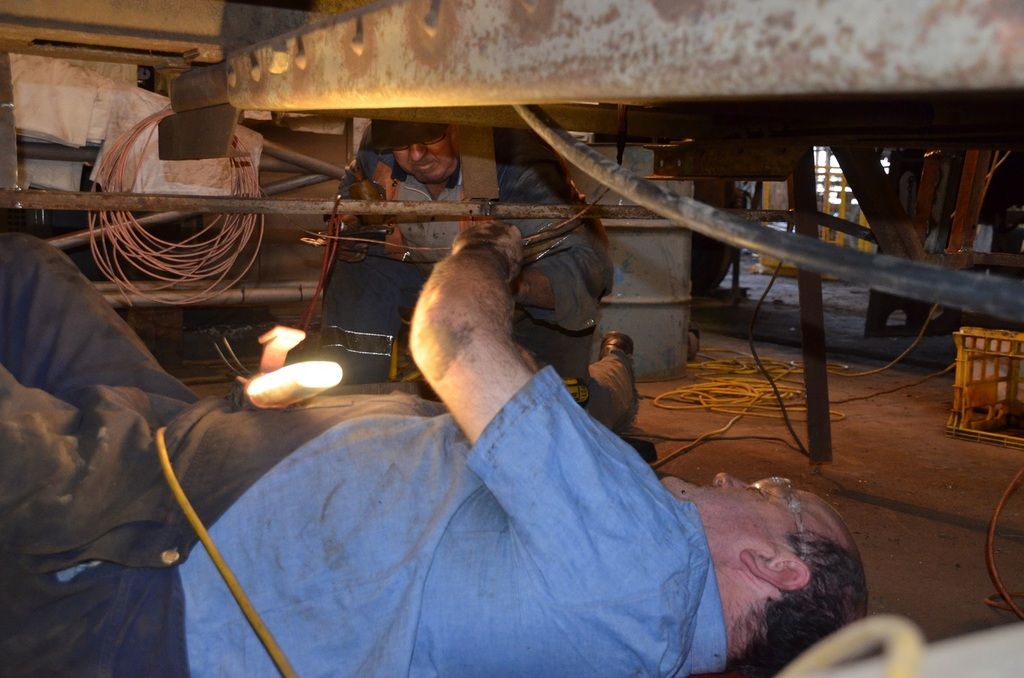
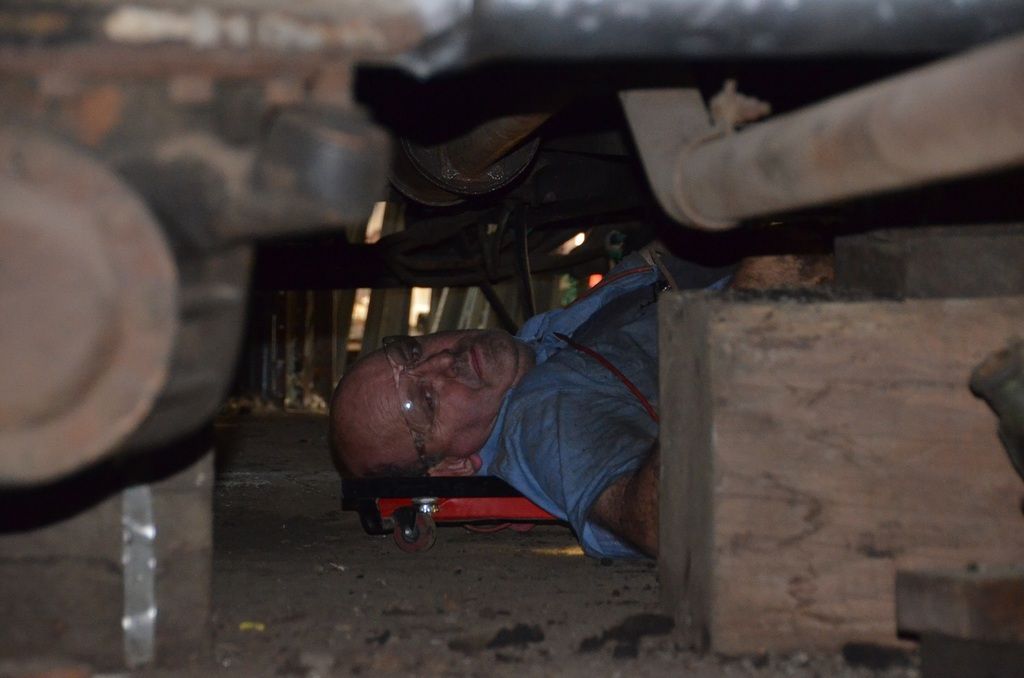
 Shows myself on our mechanics trolley rolling along under the bus installing the new electrical loom.
 Above:
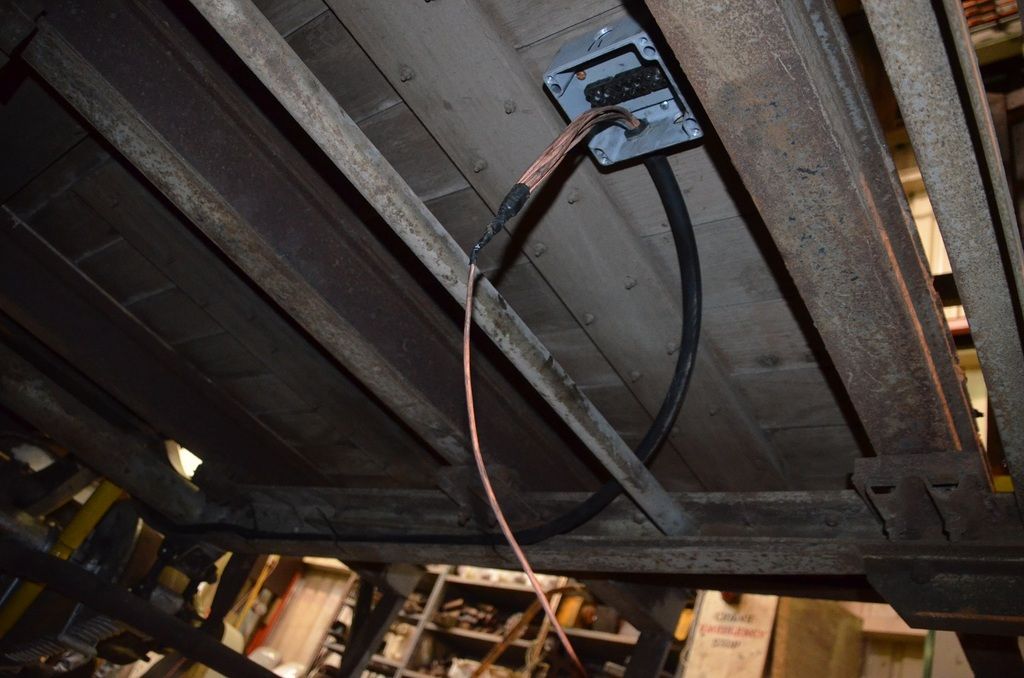
 Here is the new junction box installed to terminate the wires coming from the front of the bus and where the wires heading out to rear lights will come from.

 Above:
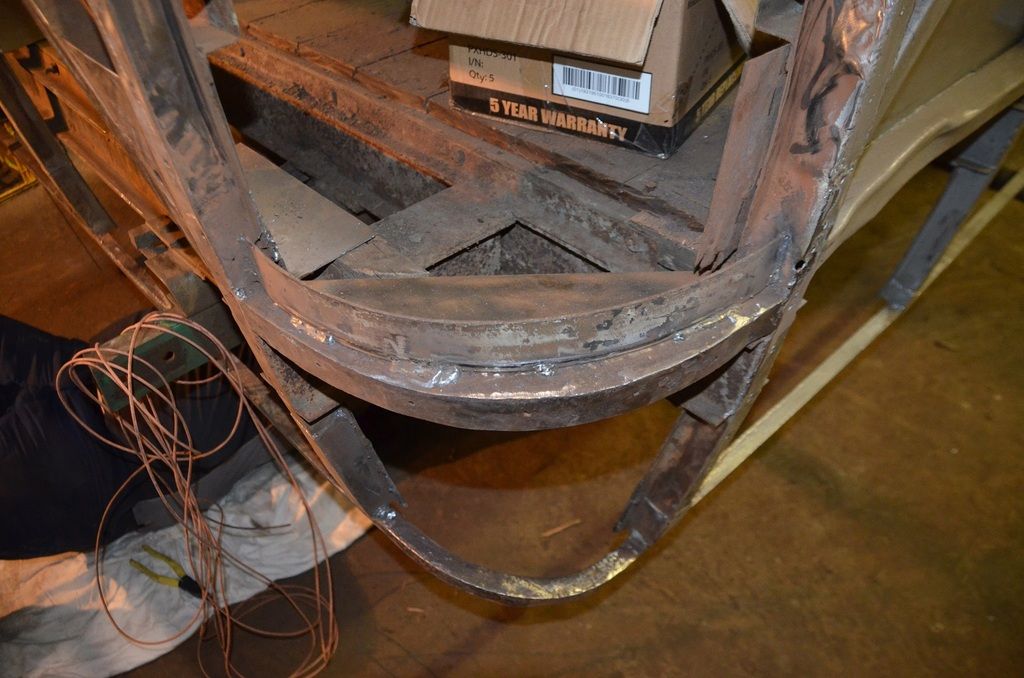
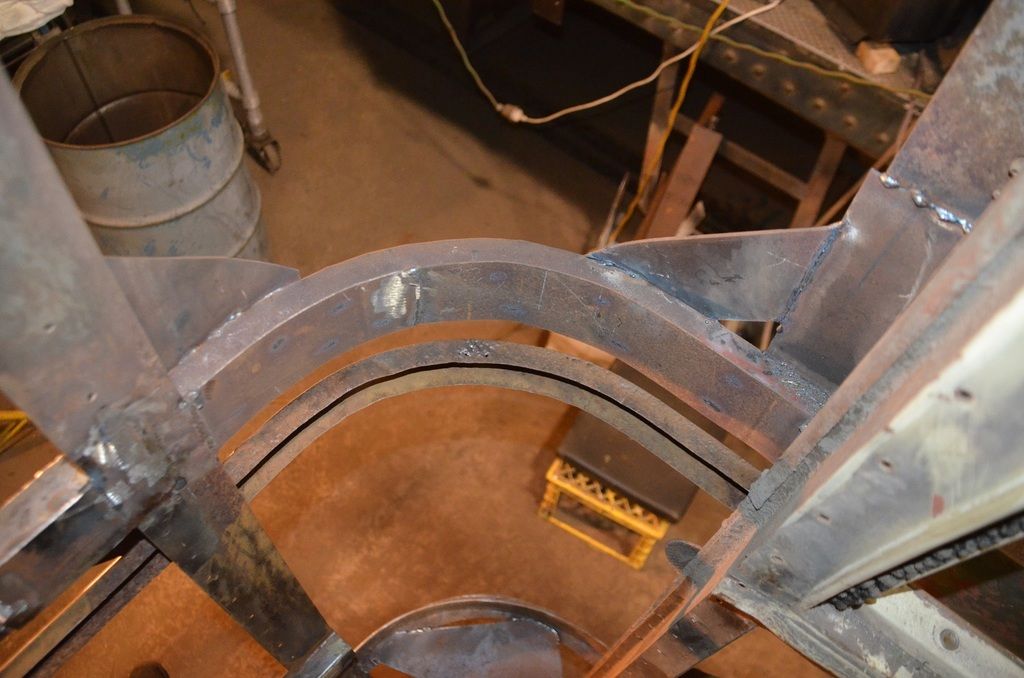
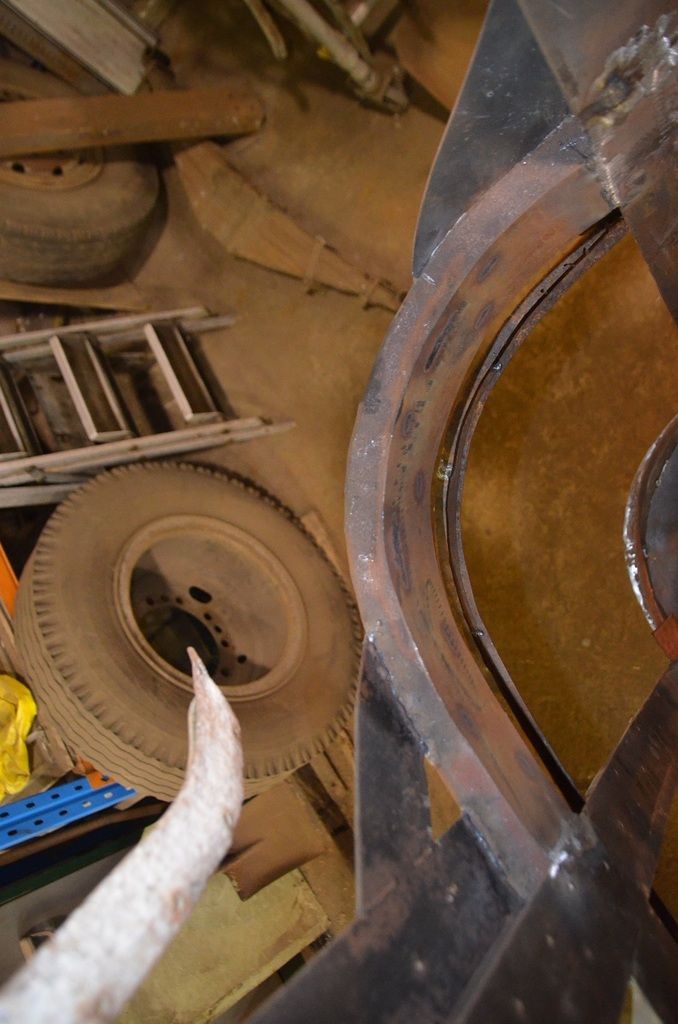
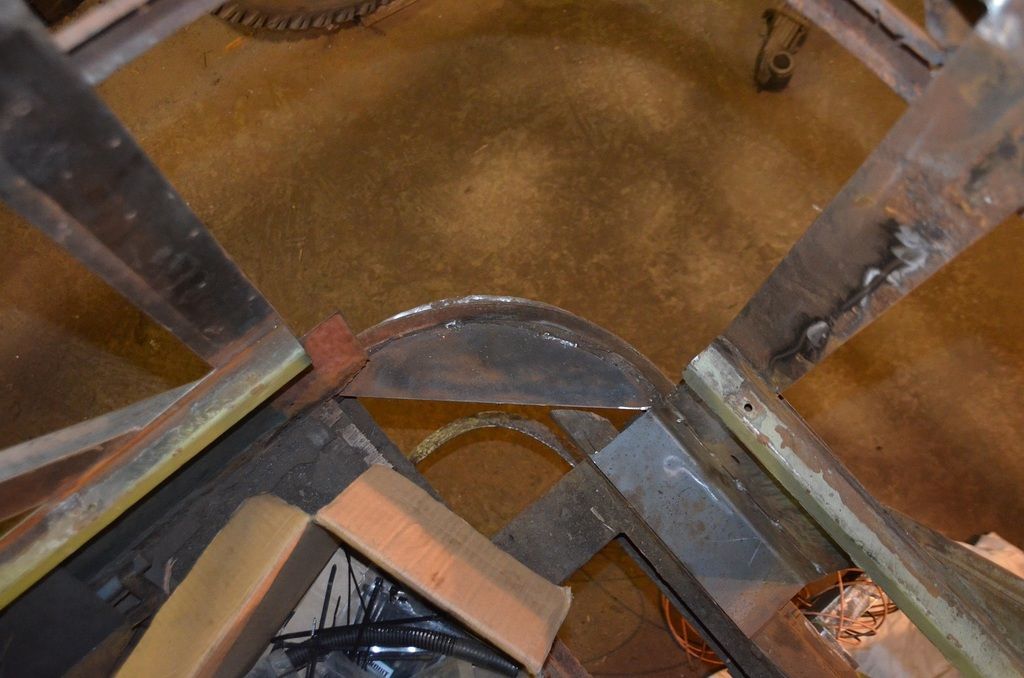
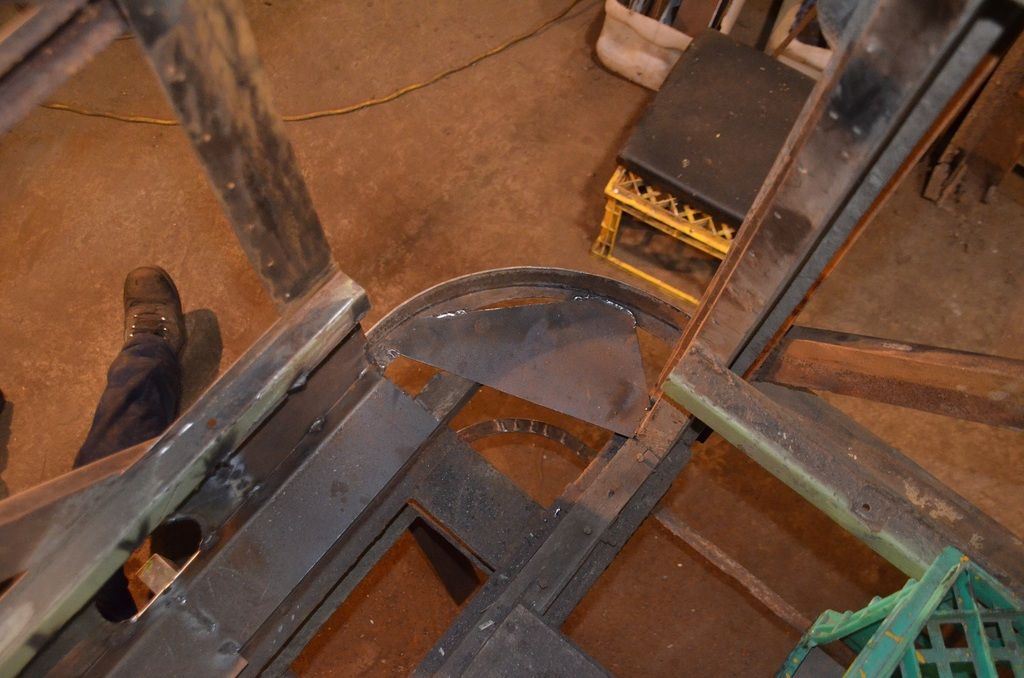
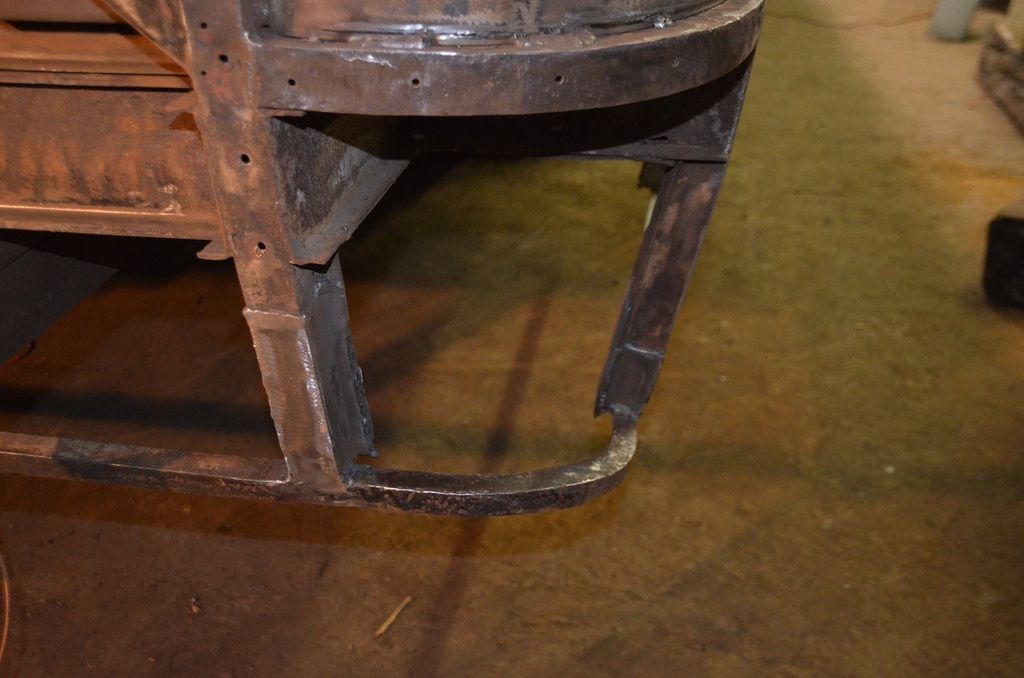
 The Eight photos above show in some detail the various frame repairs to the rear of the bus.
 Above:
 shows the first part of the near side frame repairs completed, this area was very badly decayed, and this involved setting the frame to the rolling clearances for the rear door. We needed to complete these repairs in order to complete the rear frame repairs.
 Above:
 The new loom to take the two wires over to the warhead brake switch.
 Above:
 Here we see the rear frame work has been inspected and passed, it can now be painted.
 Above:
 These two photos show me painting the rear frame work.
 Above:
 The completed rear frame repairs after painting.
 Above:
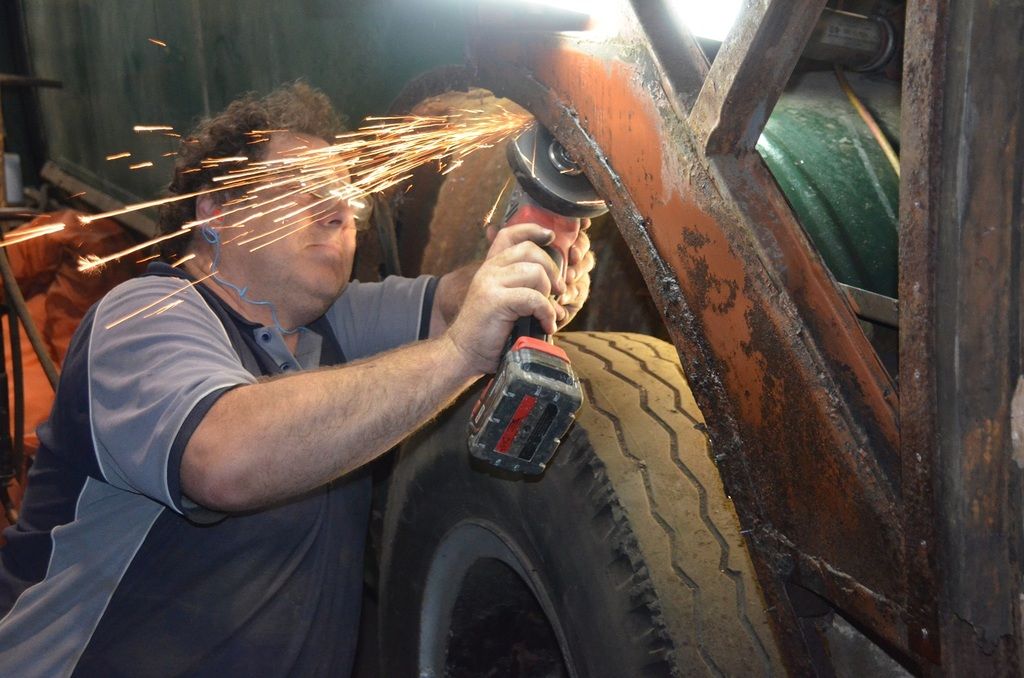
 John makes the sparks fly, as he removes the decayed and seized securing bolts to remove the near side rear wheel arch so the chassis strengthening members can be removed.
 Above:
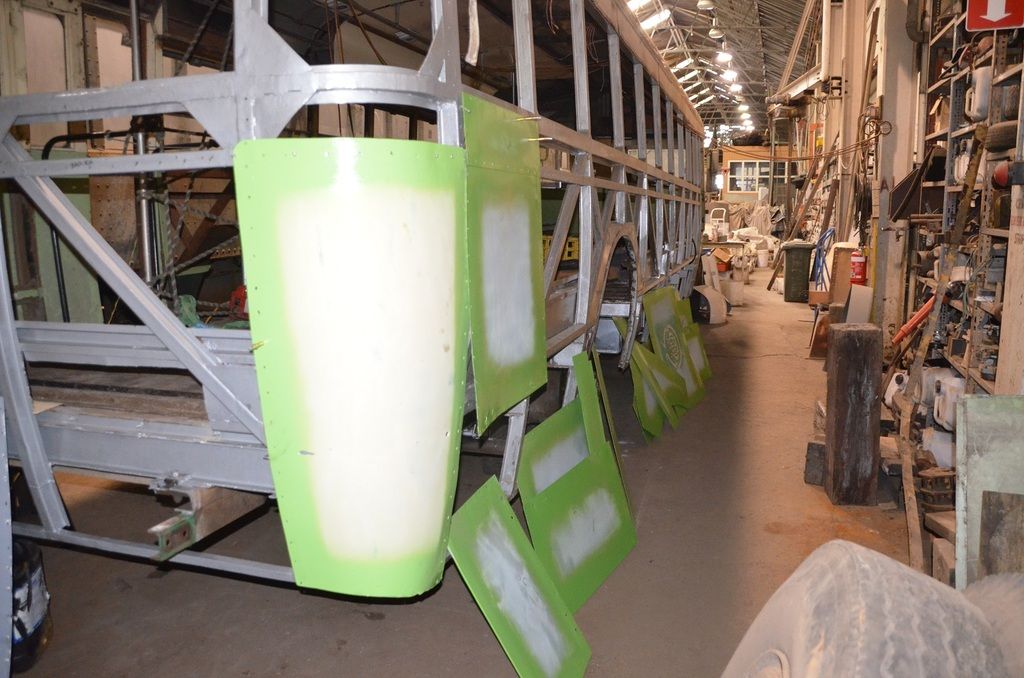
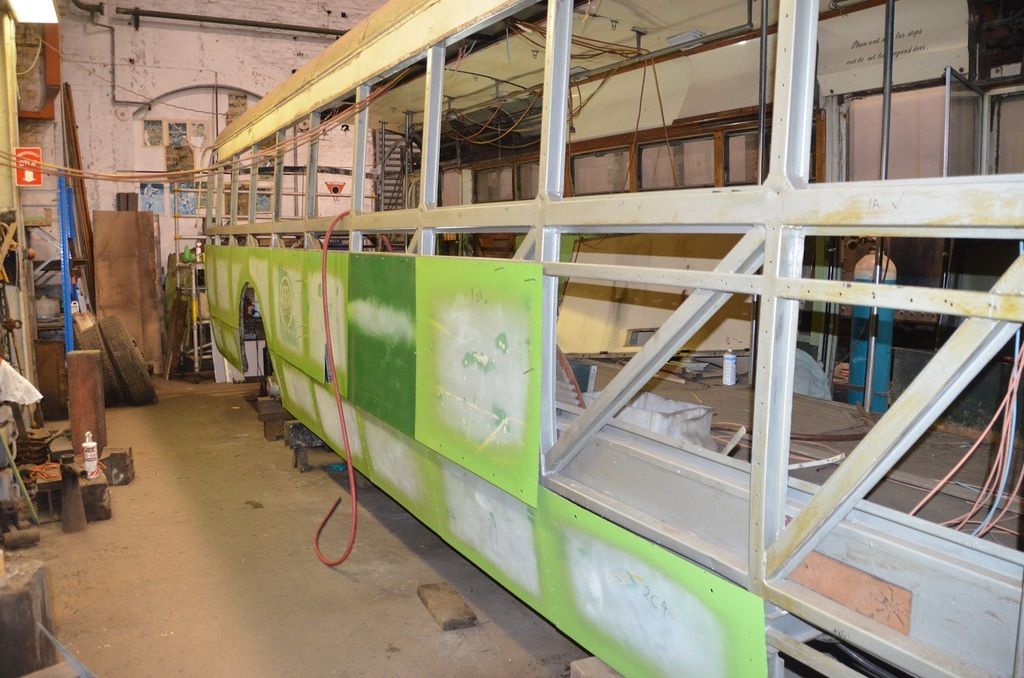
 The off side exterior panelling being rehung on the bus frame to ensure they are correctly fitted before being permanently attached.
 Above:
 This shows the correct colour paint applied to two test panels, this is the colour we obtained after paint matching AEC 537. It was unfortunate that the location where the panels had been painted had a pin hole in the roof and deposited fine water droplets onto the wet paint, lucky it was only a test! Our thanks is extended to the Bylands Tram Museum for their help and assistance in achieving this paint match.
 Above:
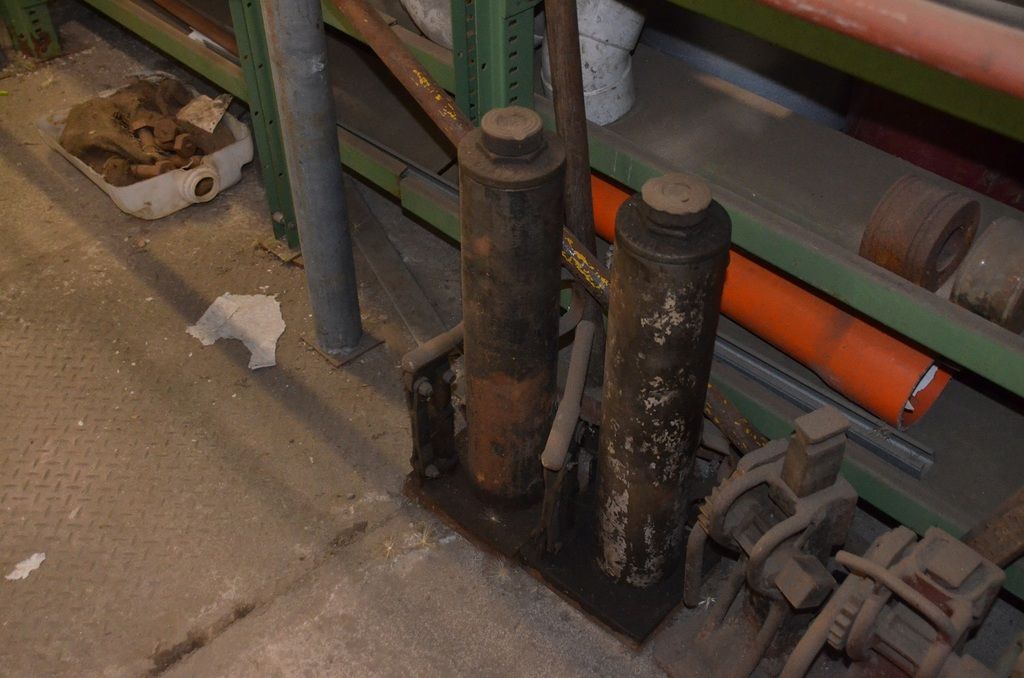
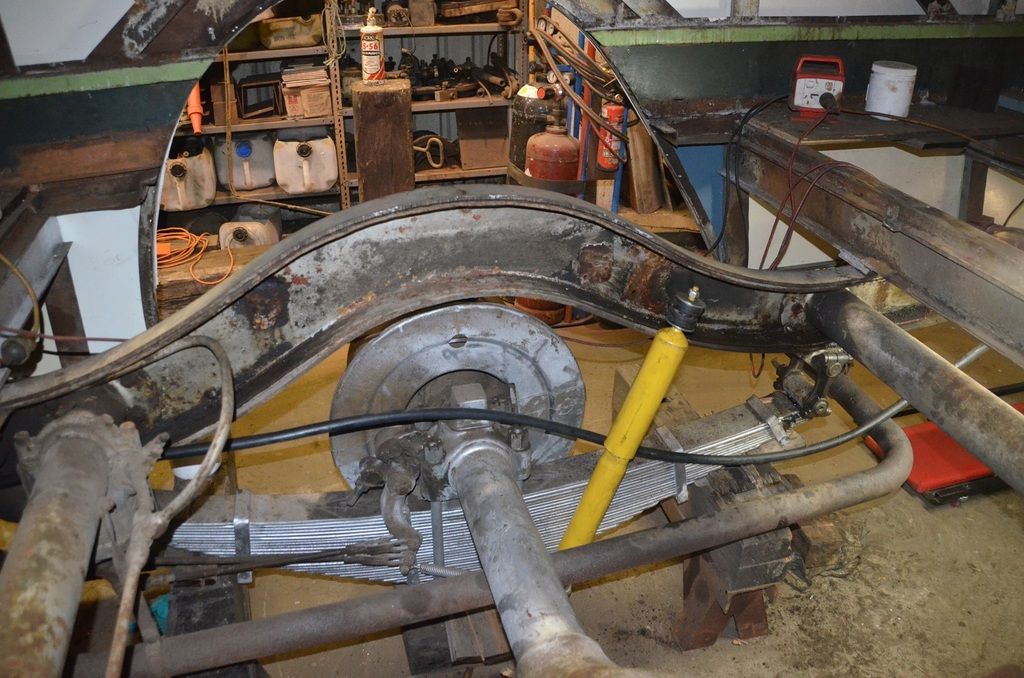
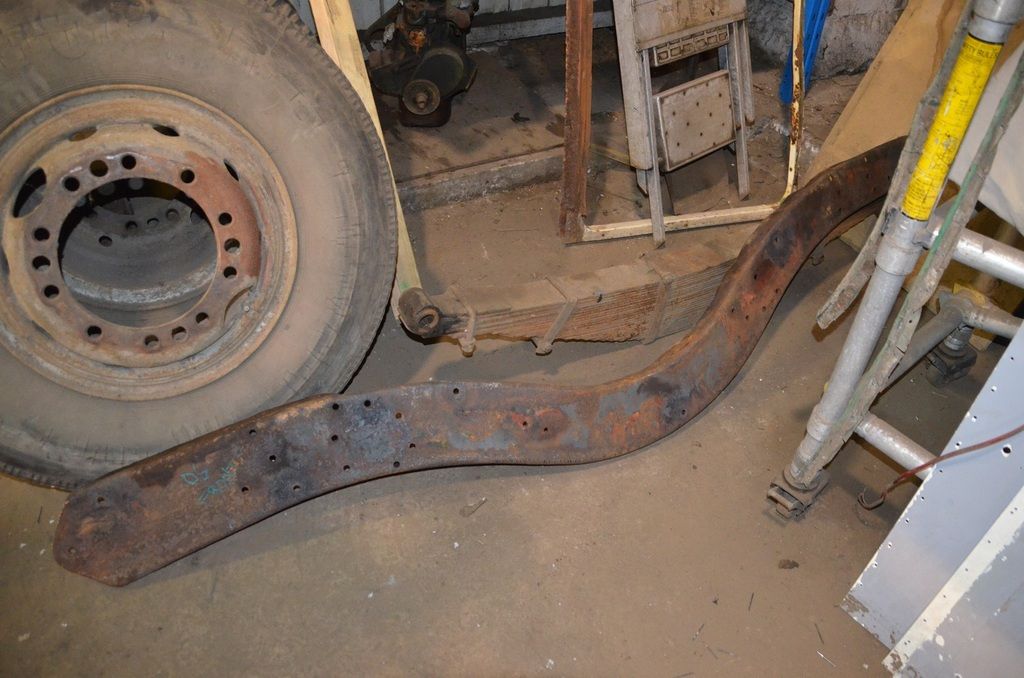
 These are the two jacks that will be used to lift the chassis once the repairs are completed, we have manufactured top caps that sit on the top of the ram and locate under the chassis rail.
 Above:
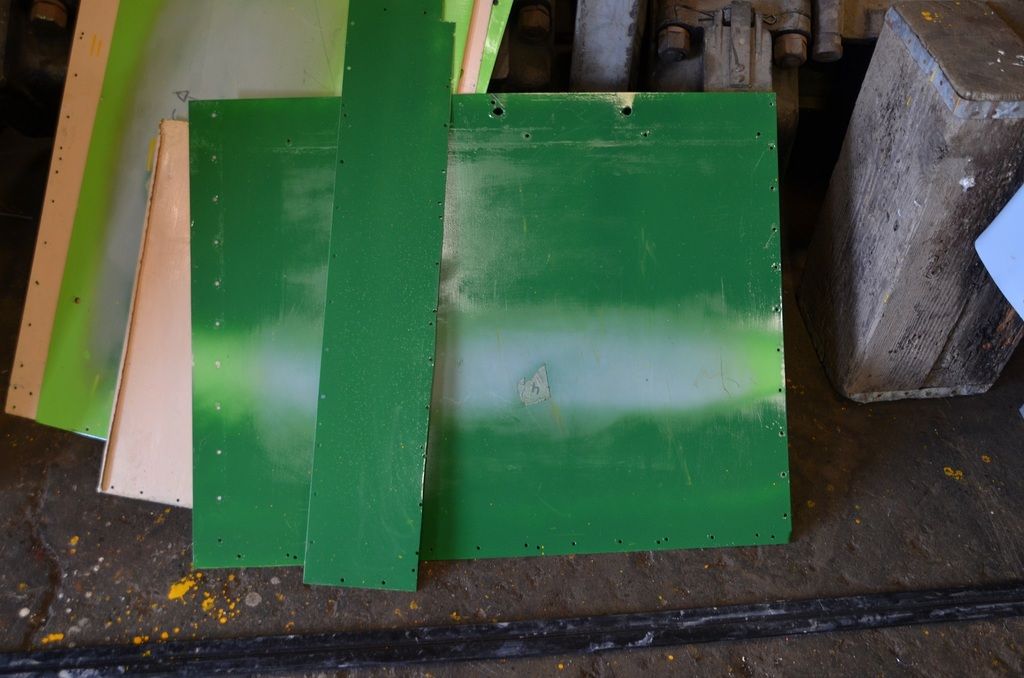
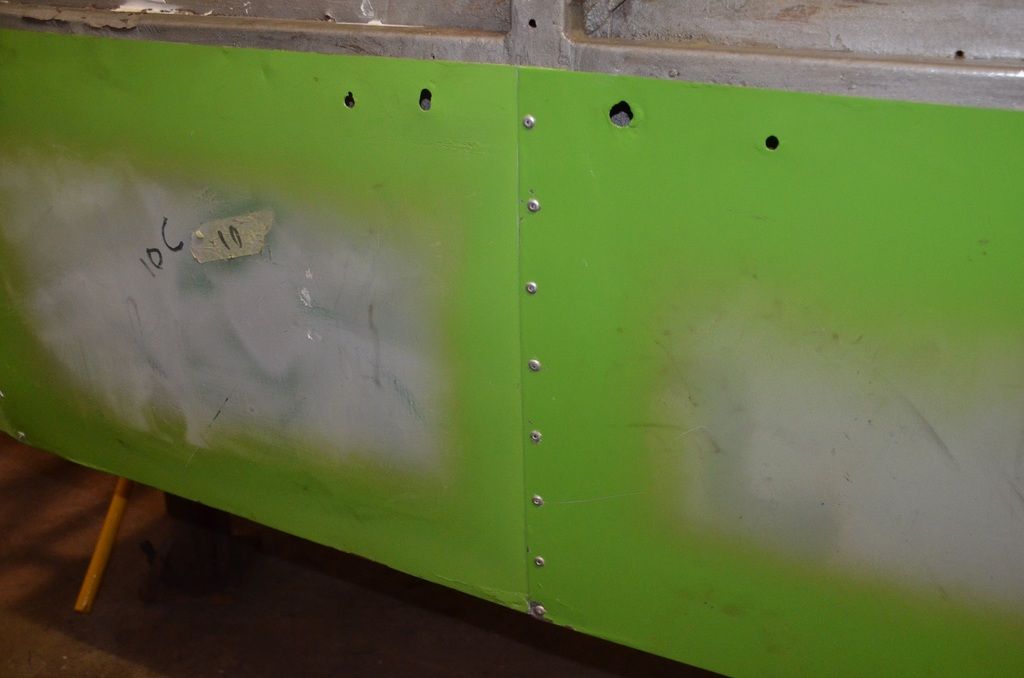
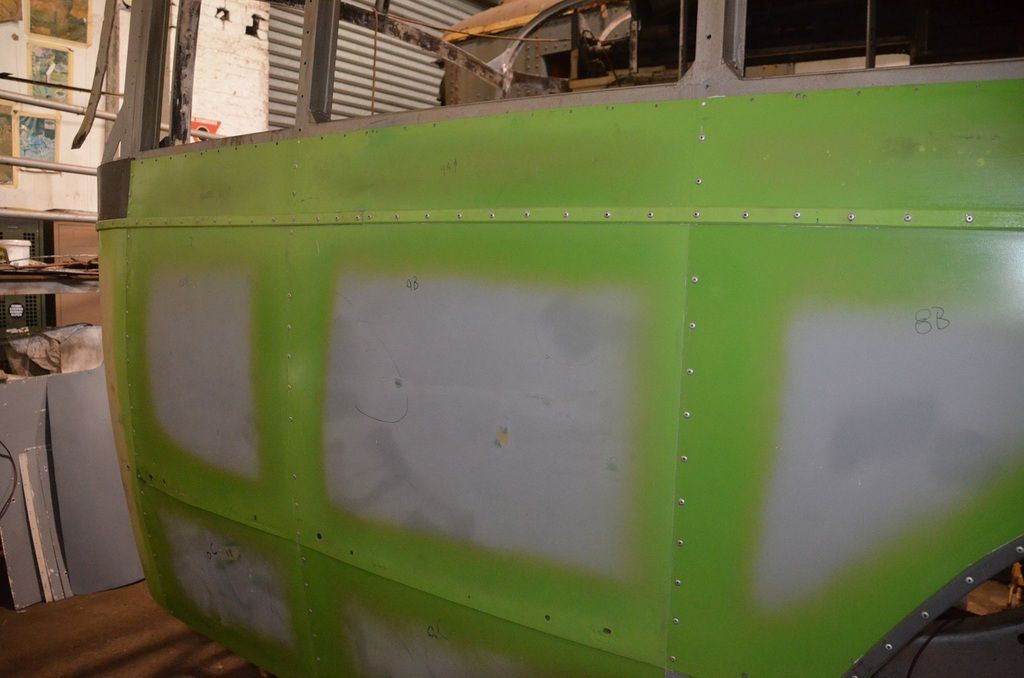
 We called the bottom panels, C panels, the larger panels above them were B panels and the small panels above them were the A panels, all the panels were numbered 1 starting directly behind the drivers cab and then were consecutively numbered to 10 at the rear of the bus. Here we see panel 10C and 9C joined with our sealant applied at the lap joint of the two panels. The panels are not sealed to the frame.
 Above:
 Here we see another view of the lower panels, here on the other side of the wheel arch moving toward the front are panels 7C and 6C joined and pop riveted onto the bus.
 Above:
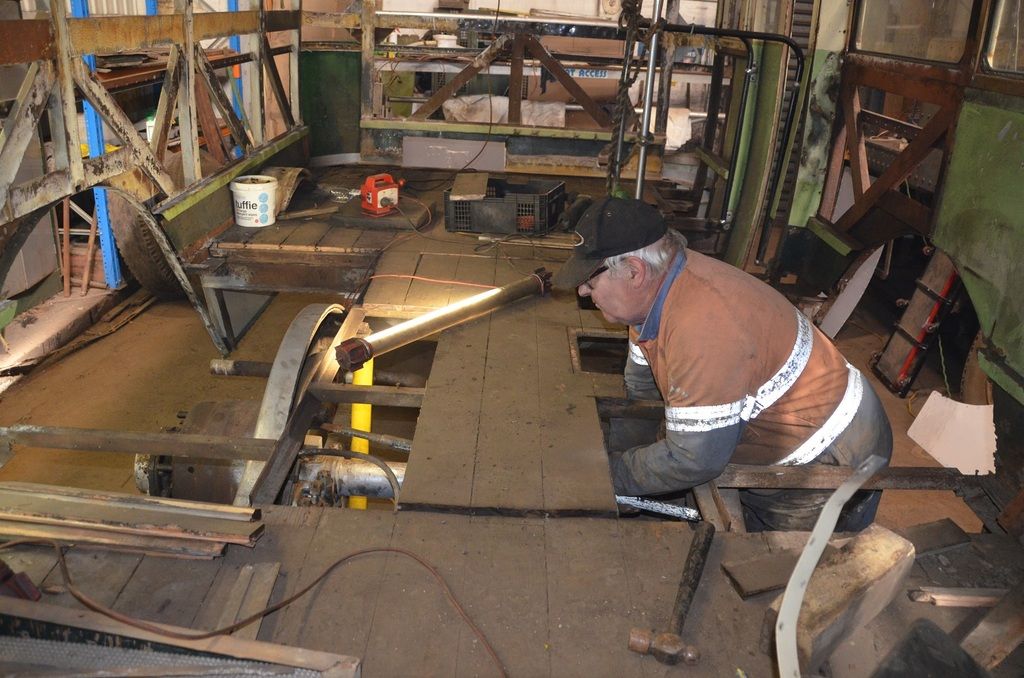
 Here we see Max in the process of removing the centre floor section over the rear suspension unit this needed to be completed to give us working room to remove the chassis strengthening members, eventually the forward and rear sections would also be removed.
 Above:
 The heads of the bolts and the chassis are marked with numbers to ensure the same bolt fits back into its respective hole these are fitted bolts and were a cow to remove.
 Above:
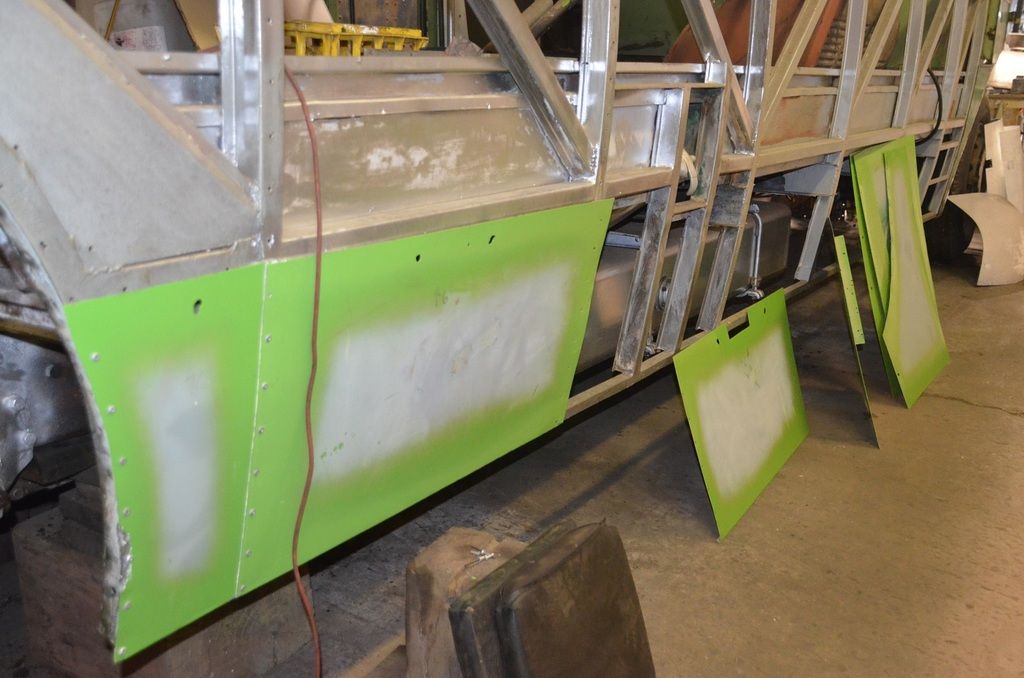
 The B panels are in the process of being installed, these lay over the top of the C panels to allow rain water to run of the higher panel onto the lower panel. Join our Patreon Channel and view “On the Buses – 2018 – No.1” to see the video of the installation of the exterior panels.
 Above:
 We were left with a jigsaw puzzle as we did not mark the dress strips as they were removed, so after about three days of trying them in various locations we finally identified where they all fit. These are some of the dress strips that fit between window sills.
 Above:
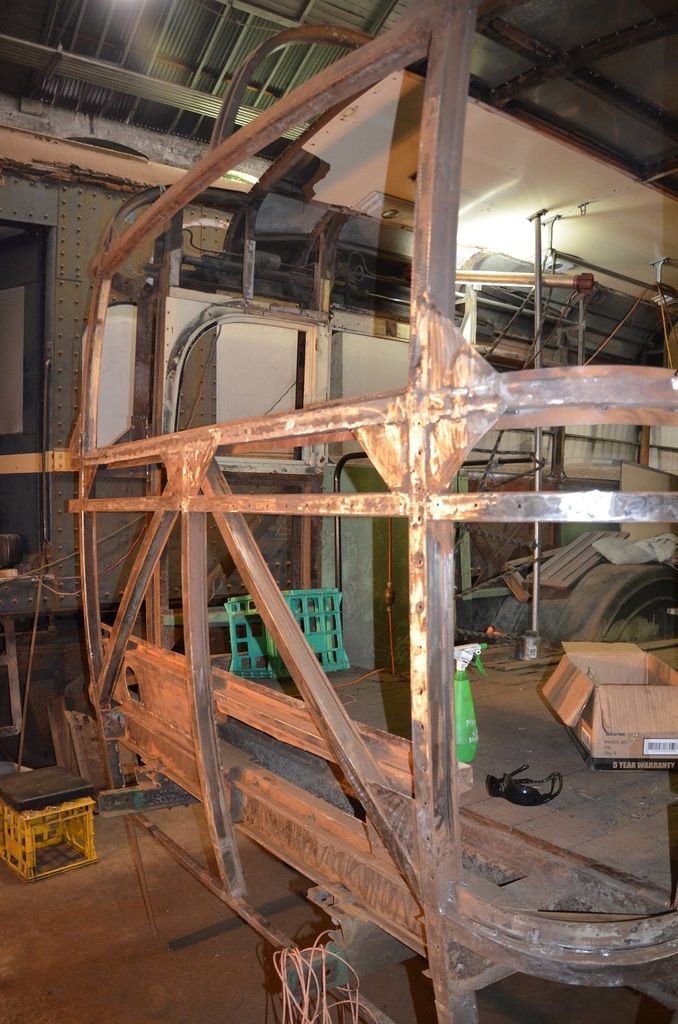
 Removing the components to allow the chassis strengthening members to be removed.
 Above:
 We see the off side wheel arch dress strip secured in place with the pop rivets.
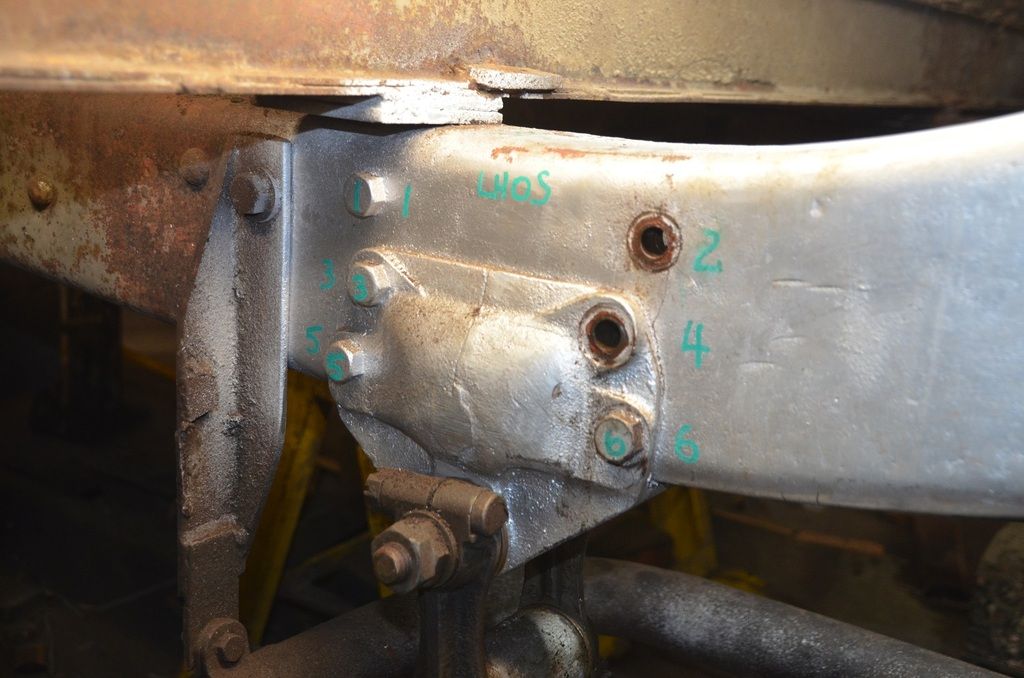
 Above:
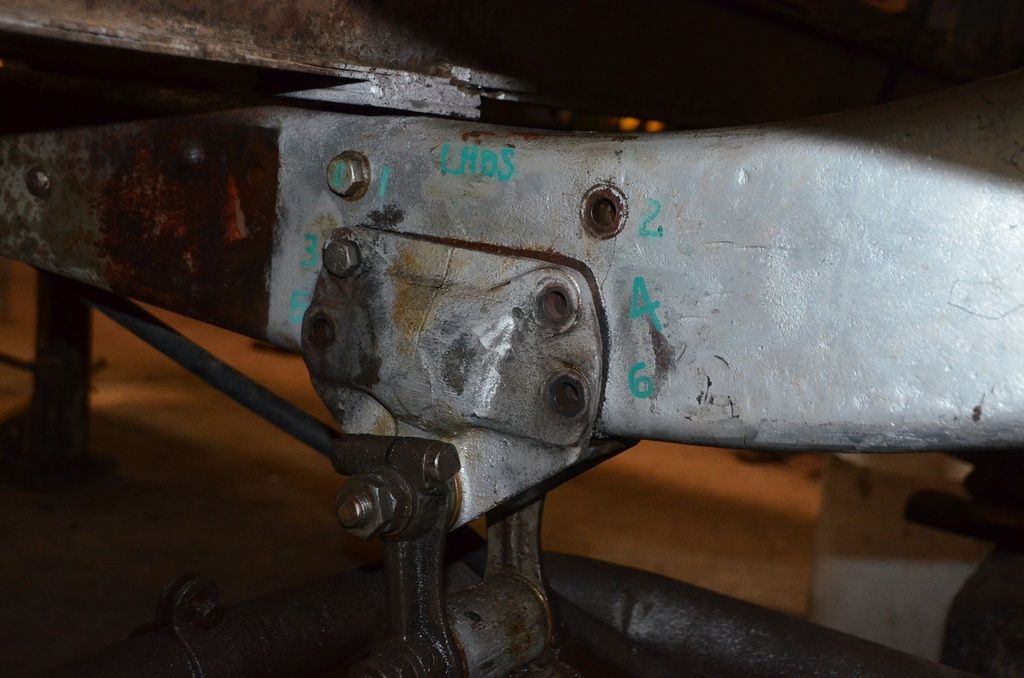
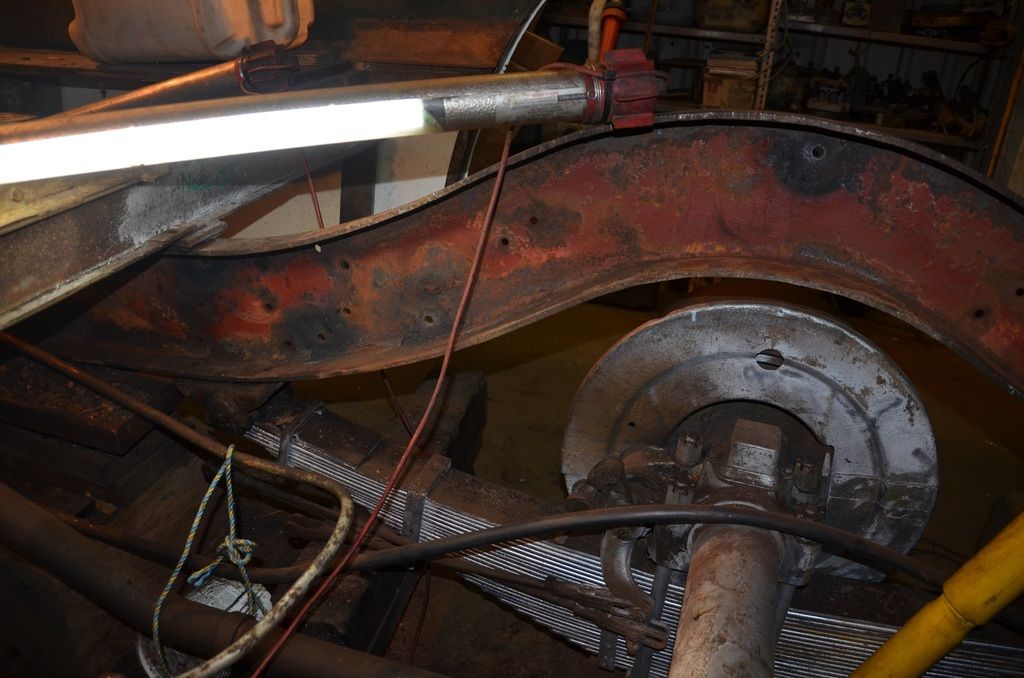
 This is a view of the Left Hand Off Side (LHOS) with most of the fitted bolts removed. The normal bolt you see in the photo is to hold the suspension casting, chassis strengthening member and the chassis rail together as the porta power was applied, prior to the application of these bolts the three parts were separating.
 Above:
 The dress strips are identified and put in place with our small bolts, they are ready for installation.
 Above:
 With the C, B, and A panels correctly identified, we see the rear panels installed with the dress strip applied, this lifted the spirits of the restoration crew as it looked great.
 Above:
 Here is a view from the rear of the bus as the off side exterior panels are being installed.
 Above:
 With the brake lines disconnected the brake cylinders are ready to remove. Join our Patreon Channel and view “On the Buses – 2018 – No.2” to see the video of the removal of the brake cylinders.
 Above:
 We see the right hand near side bolts being removed from the chassis stretcher and the suspension casting to enable the chassis strengthening member to be removed.
 Above:
 This is real progress, right here, the hand brake cross shaft has been removed, we thought it was a chassis stretcher, DOH!
 Above:
 Again, this is real progress, right here! Here are the two chassis stretchers sitting on the floor of the bus. Now nothing was physically holding the chassis strengthening members in place, right! Wrong! All that rust would not release the chassis members, they were not coming quietly so the time had arrived for drastic measures. Join our Patreon Channel and view “On the Buses – 2018 – No.6 & 7” to see the video of the removal of the chassis strengthening members.
 Above:
 Here is the near side chassis strengthening member out from its position and sitting on the rear differential unit.
Above: This is the off side chassis strengthening member out from its position and sitting on the floor, as can be seen in the photo the strengthening unit has been marked to identify its location.
Above: After the chassis strengthening member was removed it gave us the first look at the actual chassis rail. And surprisingly it looked to be in excellent condition, although that was only our observation, this was later confirmed by our accredited VicRoads engineer.
As always, my post would not be complete without a rail motor photo, (we like rail motors!)
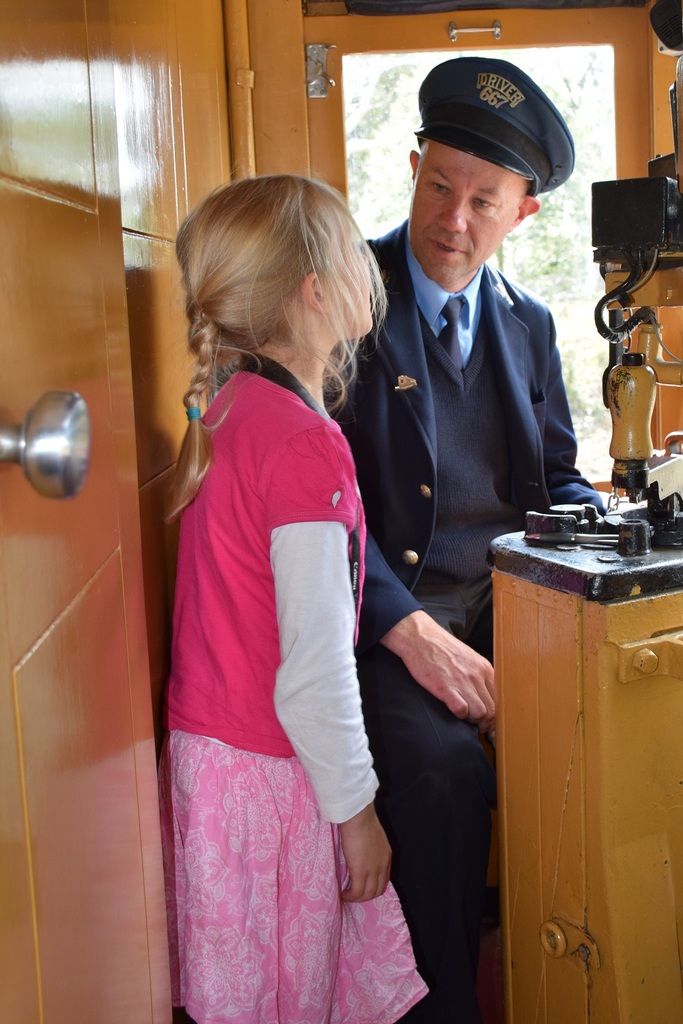 Above:
 Charters form an important part of our business, milestone birthdays are some of these charters. Here we see our tours manager in his post as a V/Line Driver at the controls of 58 RM during a charter, he is in deep conversation with one of the younger members of the charter group, after she enquired if it was hard to drive the rail motor. The picture speaks a thousand words.
Well, I think you will have to agree that this is probably my most comprehensive report yet! If you want something more comprehensive then Patreon is for you! That is it from me for now, so I will see you next year in the next post, unless you become a DERMPAV patron through our Patreon channel. As always, feel free to comment if you want, we like to receive your comments and read what you are thinking, or what you think of our restoration project, you can ask questions, share your thoughts on our project, offer constructive ideas, or offer us festive season greetings. It really is up to you. We just like to hear from all of you, who sit each year and catch up with what is going on in the restoration of AEC 560. I really hope you like the video, when it was first proposed, I thought I might be a bit nervous doing it but, in the end, I think I have warmed to it. I still say um! a lot. But I am working on that!
My how time goes quickly, another year has past since my last post! Christmas is a marvellous time. A time for family gatherings and catching up with good friends, then all too soon Christmas is over and we are celebrating and welcoming in the New Year, and then we are off again!
So on behalf of DERMPAV, I would like to thank you all for keeping abreast with the progress on AEC 560 and I would like to extend our sincerest best wishes for the coming festive season to yourself and your family. We hope you stay safe and we look forward to you joining us next year, either here or through our Patreon Channel where updates continue as AEC 560’s restoration progresses with its ultimate return to heritage service.
Regards
Colin Kelly
Secretary
DERMPAV